Create columns
The following column layout templates are available in MyText:
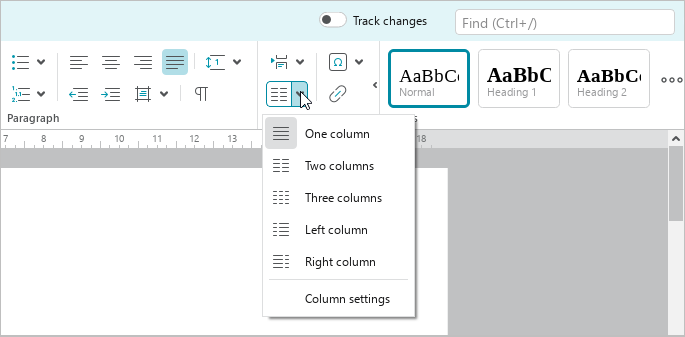
–One column: The standard layout of the text in the document.
–Two columns: The text is placed in two columns of the same width.
–Three columns: The text is placed in three columns of the same width.
–Left column: The text is placed in two columns of different widths, the narrower column is on the left.
–Right column: The text is placed in two columns of different widths, the narrower column is on the right.
You can also create a custom column layout. For example, put text in two or three columns of different widths or create more columns.
To specify the text to be placed in the columns, do one of the following:
–If the document is not divided into sections and you want to put all the text in the columns, place the cursor anywhere in the text.
–If the document is divided into sections and you want to put the entire text of the document in the columns, select the entire text of the document.
–If the document is divided into sections and you want to put text from one section into the columns, place the cursor in that section.
–If you want to place a document fragment in the columns, select the fragment.
To quickly place text in two columns of the same width, do one of the following:
–On the Home tab, in the Insert group, click  Columns.
–On the Page tab, click  Columns.
To quickly select any column layout template, do one of the following:
–On the Home tab, in the Insert group, click the arrow to the right of the Two columns button and select the desired template from the drop-down list.
–On the Page tab, click the arrow to the right of the Columns button and select the desired template from the drop-down list.

To open the Column settings window, do one of the following:
–On the Home tab, in the Insert group, click the arrow to the right of the Columns button and select Column settings command.
–On the Page tab, click the arrow to the right of the Columns button and run the Column settings command.
–If the text is already placed in columns, on the horizontal ruler, double-click either  or
or  element.
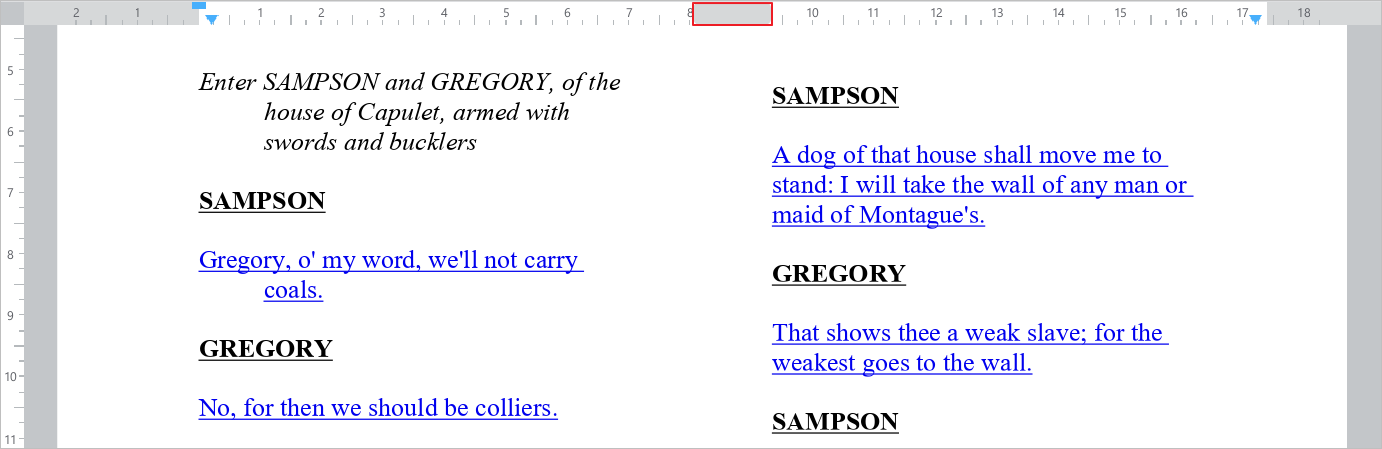
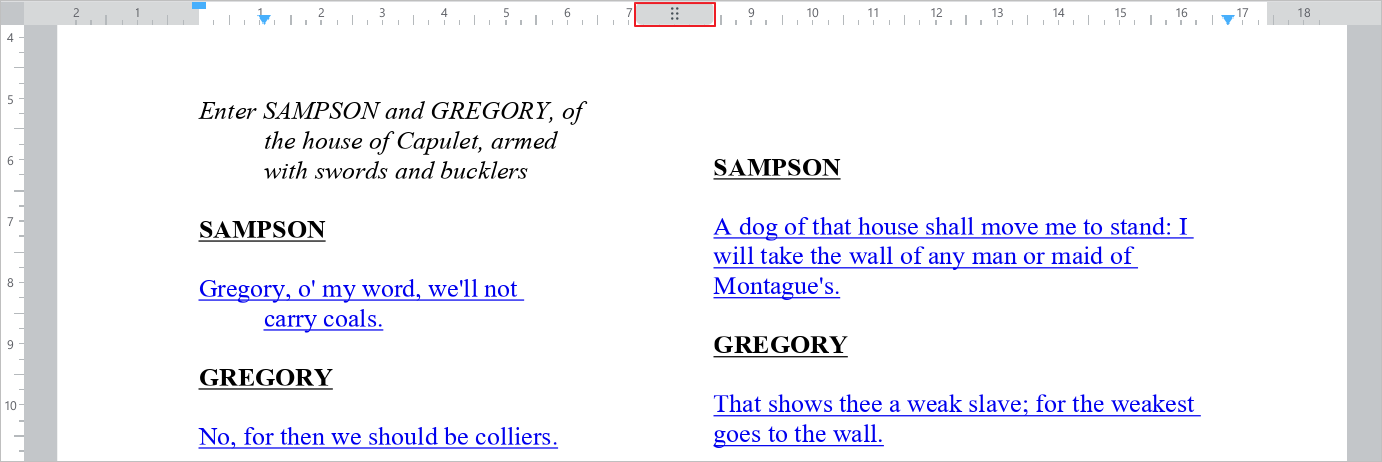
Column settings window will open. If necessary, you can resize the height of this window.
In the Column settings window, select a column layout template or manually specify the number of columns you want to create in the document in the Number box.
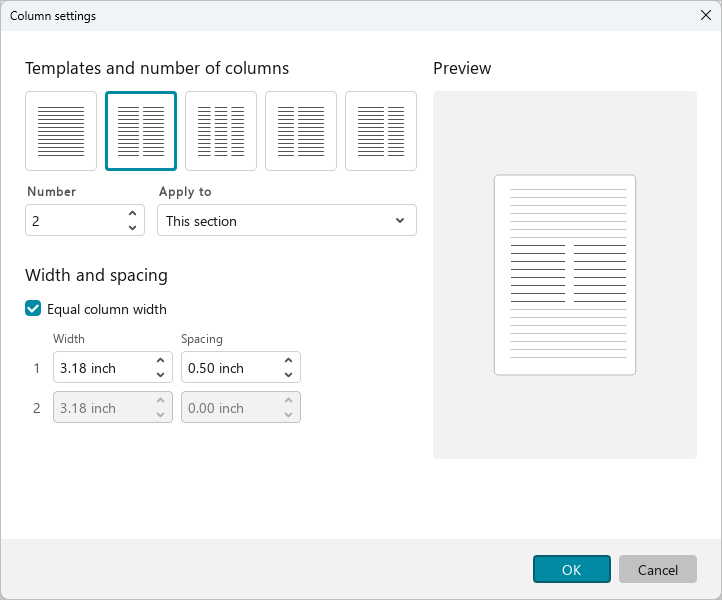
In the Apply to drop-down list, specify to which part of the document you want to apply the column layout:
–Selection: The option is available if a fragment is selected in the text.
–This section: To the section in which the cursor is positioned.
–End of document: From the cursor position to the end of the document.
–Whole document.
If you want the columns to have the same width, make sure you select the Equal column width checkbox. If necessary, specify either the desired Width or Spacing between columns. The second value will be selected automatically.
If you want to configure columns of different widths and/or specify different column spacing, clear the Equal column width checkbox. Specify the required Width and/or Spacing for the desired columns. The width and spacing of other columns will be recalculated automatically. The Interval box for the last column is grayed out as there is no interval after this column.
You can enter a value in the Number, Width and Spacing boxes manually, change it using the counter, the keyboard keys ↑ and ↓ or by scrolling the mouse wheel.
One step of increasing or decreasing the value in the Number box is equal to 1, in the Width and Spacing boxes is 0.1. The step size can be increased by 10 times. For example, in the Width and Spacing boxes, the step will be 1. To do this, proceed with one of the following:
–Change the value by holding Shift down.
–Press Page Up (Windows, Linux) or Fn+↑ (macOS) to increase the value. Press Page Down (Windows, Linux) or Fn+↓ (macOS) to decrease the value.
The result of applying the parameters specified in the Column settings window is displayed in the Preview area.
To confirm the specified parameters, click OK.