Insert a shape
- General information
- Before you begin
- Interface overview
- Screen elements
- Command menu
- Main menu
- Toolbar
- Change the display mode
- Hide or display tool group titles
- Hide or display the content of tool groups
- Customize the composition of the Favorites group of tools
- Add a button
- Change a button to run a macro
- Move an element
- Delete an element
- Clear the Favorites group
- Hide or display the Favorites group
- Formula bar
- Quick actions pane
- Workspace
- Sheet tabs
- Sidebar
- Status bar
- Focus on cell
- Theme
- Language
- Files
- New file
- Save as template
- New from template
- Open a file
- File in .xls format
- File in .xlsb format
- File in .xml format
- View-only file
- File is used by another application or user
- Convert a file
- Recent files
- Send a file
- Preview and print
- Save a file
- Autorecovery of documents
- Close a file
- Cells, columns, and rows
- Expand the workspace
- Select a cell range
- Active cell of the range
- Select colums or rows
- Multiple selection
- Resize cells
- Resize a column or row
- Merge or unmerge cells
- Insert columns or rows
- Hide or unhide a column or row
- Freeze columns, rows, or area
- Group columns or rows
- Delete columns or rows
- Data
- Enter data
- Enter data in a cell
- Automatically adjust cell width
- Floating cell
- Autofill cells
- Text formatting of formulas and numbers
- Sort and filter
- Create a range of filtering
- Sort
- Single-level sorting
- Multi-level sorting
- Filter
- Filter by values
- Filter by cell fill color
- Filter by condition
- Filter by numeric values
- Filter by date
- Filter by text
- Filter using the advanced filter
- Transfer of conditions between filters
- Use of wildcards
- Clear filter
- Copy and paste filtered data
- Reapply a filter
- Finish work with sorting and filtering range
- Split into columns
- Data validation
- Add data validation
- Edit data validation
- Remove data validation
- Actions with cells containing data validation
- Enter a date
- Enter a value in a cell with a drop-down list
- Track and view changes
- Find and replace
- Delete data
- Remove duplicates
- Links
- Insert a link to a web page or email address
- Insert a link to a place in the document
- Insert a link to a file
- Quick link insertion
- Follow the link
- Copy a link
- Edit a link
- Delete a link
- Keyboard shortcuts for moving between window elements
- Notes
- Special characters
- Current date or time
- Spelling and grammar
- Number formats
- Define cell format
- Open number format settings window
- General
- Number
- Split the number into digit groups
- Change the number of decimal places
- Customize negative number display style
- Currency
- Select a currency code or symbol
- Change the number of decimal places
- Customize negative number display style
- Accounting
- Date, Time, and Date and time
- Percentage
- Fraction
- Scientific
- Text
- Formulas and functions
- Formulas and functions basics
- Order of operations in a formula
- Reference cells and cell ranges
- Recalculation of formulas
- Select formula recalculation mode
- Sheets
- Insert a sheet
- Switch to another sheet
- Rename a sheet
- Hide or unhide sheets
- Change the color of the sheet tab
- Duplicate a sheet
- Copy a sheet
- Move a sheet
- Select a sheet from the list
- Zoom a sheet
- Hide or display zero values
- Delete a sheet
- Recalculation of formulas in automatic mode
- Recalculate formulas manually
- Recalculate formulas when saving a document
- Automatic calculation
- Enter functions
- Function wizard
- Replace a formula with its result
- Names in formulas and functions
- Reference to data in another document
- Structured references
- Array formulas
- Calculation operators
- Tables
- Create a table
- Open the table settings pane
- Customize the appearance
- Rename the table
- Automatic table expansion
- Add a calculated column
- Select the type of calculation in the total row
- Convert a table to a regular range
- Delete a table
- Pivot tables
- Create a pivot table
- Create a pivot table based on the data in the current file
- Create a pivot table based on data from an external source
- Open the pivot table settings pane
- Define the structure of the pivot table
- Add fields
- Change the field order in a section
- Rename a field
- Select value calculation functions
- Delete a pivot table field
- Customize the pivot table parameters
- Change the data source
- Select the pivot table layout
- Customize the display of grand totals
- Customize the display of subtotals
- Enable viewing of cell details
- Edit captions
- Manage external sources
- View the list of external sources
- View information about an external source
- Change information about an external source
- Add an external source
- Delete an external source
- Filter data in a pivot table
- Filter data using the report filter
- Filter rows and columns by values
- Filter rows and columns by condition
- Clear the filter
- Sort data in a pivot table
- Collapse or expand the elements of pivot table
- View cell details
- Refresh a pivot table
- Copy a pivot table
- Delete a pivot table
- Charts
- Insert a chart
- Open the chart settings pane
- Chart settings
- Open chart elements settings
- Customize the appearance of an element
- Customize element text formatting
- Adjust the parameters of axes and gridlines
- Hide or display an element
- Move a chart
- Move the chart title
- Copy, cut or insert a chart
- Change chart type
- Resize a chart
- Change source data
- Change the data range for the chart
- Delete a chart or a chart element
- Images
- Shapes
- Insert a shape
- Insert a text box
- Fill a shape
- Outline
- Select the color of the shape outline
- Select the thickness and line type of the shape outline
- Apply outline settings of the previous shape
- Remove the shape outline
- Line style
- Select a line color
- Select the thickness and line type
- Apply the style of the previous line
- Remove the line style
- Resize a shape
- Fit shape size to text
- Change line length and angle
- Select arrowhead type
- Move a shape
- Delete a shape
- Format
- Font
- Font size
- Text formatting
- Text color
- Highlight color
- Alignment
- Rotate text
- Wrap text
- Character spacing
- Cell fill color
- Cell borders
- Conditional formatting
- Create a formatting rule
- Create a rule of the Regular highlighting type
- Create a rule of the Color scale type
- Create a rule of the Data bars type
- Create a rule of the Icons type
- Clear formatting rules
- Copy and apply formatting
- Clear formatting
- Edit content
- Undo and redo
- Cut or copy data
- Paste the last cut or copied data
- Paste data while maintaining the original formatting
- Paste data without preserving the original formatting
- Insert a formula
- Insert the result of the formula calculation
- Paste data and transpose
- Clipboard history
- Change paste parameters
- Automation tools
- Document protection
- Functions manual
- Financial functions
- Date and time functions
- Math and trig functions
- ABS
- ACOS
- ACOSH
- ACOT
- ASIN
- ATAN
- ATAN2
- ATANH
- COSH
- COTH
- CSC
- CSCH
- DEGREES
- EXP
- FACT
- FACTDOUBLE
- INT
- LN
- LOG
- LOG10
- PI
- POWER
- PRODUCT
- QUOTIENT
- RAND
- ROUND
- ROUNDDOWN
- ROUNDUP
- SEC
- SECH
- SINH
- SQRT
- SQRTPI
- SUBTOTAL
- SUM
- SUMIF
- SUMIFS
- SUMPRODUCT
- SUMSQ
- TANH
- Statistical functions
- AVERAGE
- AVERAGEIF
- CORREL
- COUNT
- COUNTA
- COUNTBLANK
- COUNTIF
- COUNTIFS
- F.DIST
- F.DIST.RT
- FISHER
- LARGE
- LINEST
- MAX
- MEDIAN
- MIN
- MODE
- NORM.DIST
- RANK.EQ
- SMALL
- STDEV.S
- VAR
- VARA
- VARPA
- Lookup and reference functions
- ADDRESS
- AREAS
- CHOOSE
- COLUMN
- COLUMNS
- GETPIVOTDATA
- HLOOKUP
- HYPERLINK
- INDEX
- INDIRECT
- LOOKUP
- MATCH
- OFFSET
- ROW
- ROWS
- TRANSPOSE
- VLOOKUP
- Database functions
- Text functions
- ASC
- CLEAN
- CODE
- CONCATENATE
- DBCS
- EXACT
- FIND
- FINDB
- JIS
- LEFT
- LEFTB
- LEN
- LENB
- LOWER
- MID
- MIDB
- PROPER
- RIGHT
- RIGHTB
- SEARCH
- SEARCHB
- SUBSTITUTE
- TEXT
- TRIM
- UNICODE
- UPPER
- VALUE
- Logical functions
- Information functions
- Engineering functions
- Additional information
You can add shapes of the following types to your documents: line, rectangle, ellipse, triangle, diamond, folded corner, star, heart, brackets, arrows, callouts, and text boxes.
Insert a line
To insert a line into a document, do the following:
1.Open the Insert sub-menu using one of the following methods:
•On the Insert tab, click  Shape.
•When working in macOS, select the Insert > Shape > Lines command from the command menu.
2.In the sub-menu that opens, select the type of line to insert: line, arrow, double-sided arrow. The cursor will look like a crosshair  .
.
3.If needed, select the arrowhead type.
4.Add a line in one of the following ways:
•Click the left mouse button on the place where the line start point should be located. A line with a length of 4.24 cm and an angle of 45° will be added to the document.
•Hold down the left mouse button and draw a line in the desired location of the document. To finish drawing, release the left mouse button.
5.If needed, edit the length and angle of the line.
Insert a shape
To add a shape to your document, do the following:
1.Select the cell or range of cells to align the upper-left corner of the shape with. If a range has been selected, the shape will be aligned relative to the active cell.
2.Display the list of shapes in one of the following ways:
•On the Insert tab, click Shape.
•When working in macOS, select the Insert > Shape command from the command menu.
3.In the sub-menu that opens, select the desired shape:
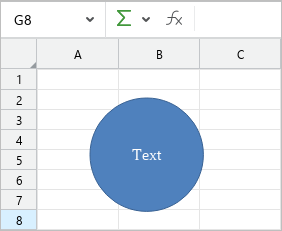
You can add text or a link to the shape. To do this, follow these steps:
1.Double-click the shape to enter edit mode.
2.Add text or a link to the shape:
•Enter the text manually. Text formatting in a shape is done in the same way as text formatting in a document.
•Insert a link into the shape as described in the Links section.
3.Click anywhere on the sheet outside the shape to exit edit mode.
Insert a text box