Account settings
To configure account settings, open the Account Settings pane using one of the following ways:
•On the Menu Bar, select Tools > Account Settings.
•In the folders window, select the desired account. In the pane that opens on the right, click  .
.
•In the folder window, select the desired account, right-click the context menu, and select Settings.
•On the Toolbar, click the menu call  MyOffice Mail menu. In the menu that appears, select Account Settings.
Select the required account in the left pane. The settings of the selected account will appear in the right pane.
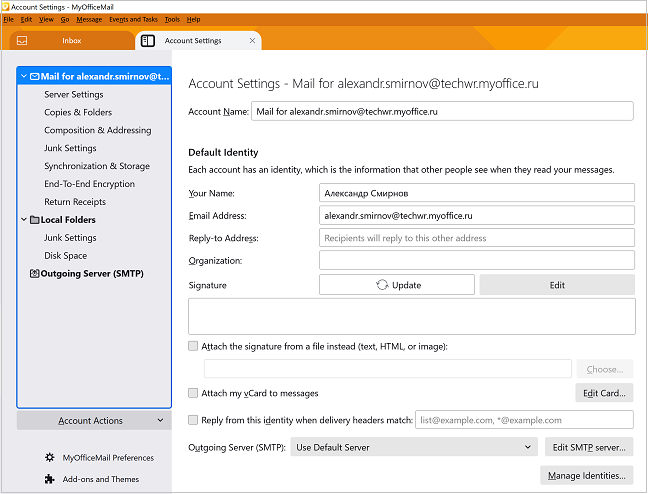
Main account settings
Fill in the following fields: •Account name, the account name will be updated in the left pane when you change focus •Sender name •Email address •Reply address •Organization |
Signature parameters
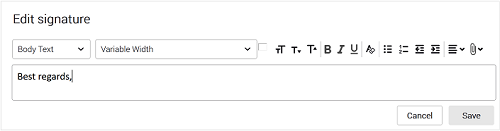
The signature field contains text that is automatically added to the end of the message when the message is created. The signature text can be generated in two ways: 1.On the local client when configuring the account settings. To create or edit a local signature, click Edit in the Signature section. In the dialog box that opens, type your signature text. Use the formatting and object insertion tools if necessary. Click Save. In this case the signature will be saved locally without being sent to the server.
2.On the web version of MyOffice Mail in the Personal information section you can enter the signature text and select to use it by default. In this case the signature can be obtained from the server and later used on the client. To obtain a signature on the local client from the server, click
Click the Update button. The current signature will be replaced by the signature from the web version of MyOffice Mail. |
 . A warning message appears on the screen:
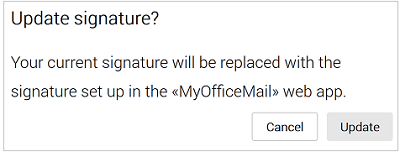
Using a business card in messages
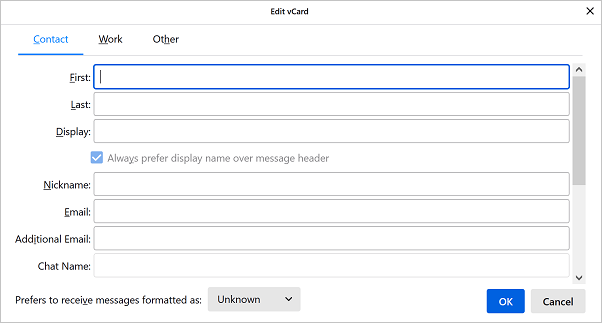
To attach a business card to messages you send, use the Attach my vCard to messages check box. Click Edit Card. The Edit vCard dialog box appears. The dialog box includes three tabs. The Contact tab contains the following fields: 1.First, Last name 2.Display name 3.Nickname 4.Email, Additional Email 5.Chat Name 6.Phone numbers: Work, Home, Fax, Pager, Mobile
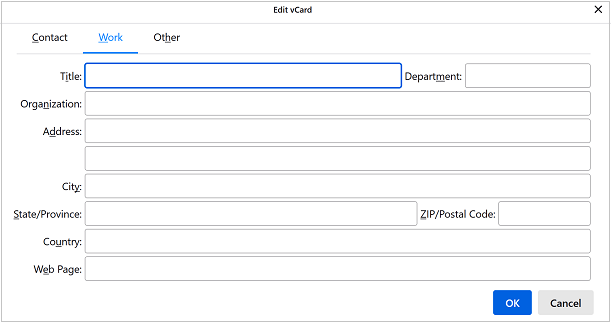
The Work tab contains the following fields: 1.Title 2.Department 3.Organization 4.Address 5.City, State/Province, ZIP/Postal Code, Country 6.Web Page
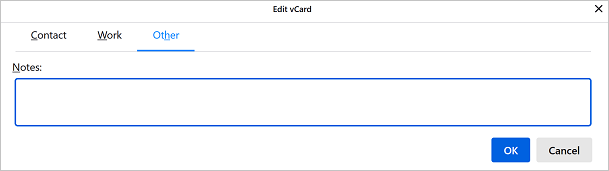
On the Other tab allows you to edit the additional fields and notes to the business card.
|
Outgoing server settings
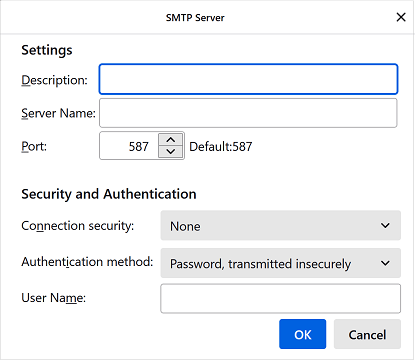
To configure the outgoing mail server settings, click Edit. The SMTP Server will open where you can fill the following fields: 1.Description 2.Server Name 3.Port 4.Connection security 5.Authentication method 6.User Name
|
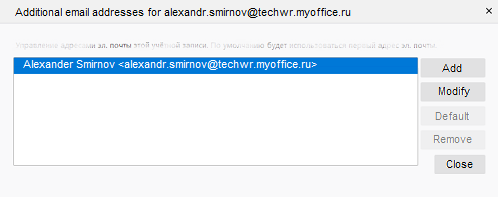
Set up additional email addresses
Click the Additional email addresses button. A dialog box appears on the screen.
The dialog box displays a list of additional email addresses. To add an additional email address, click the Add button. The Edit Email Address dialog box appears. To change the parameters of the selected email address, click the Modify button. The Edit Email Address dialog box appears. To use the address as the sender's address, select the address in the list and click Default. To remove the address from the list, click the Delete button. |