Synchronize accounts
To synchronize local data with the server, click the  button or choose command menu Tools > Synchronization settings.
A dialog box will open on the screen, containing a list of resources for synchronization, such as messages, calendars, tasks, address books.
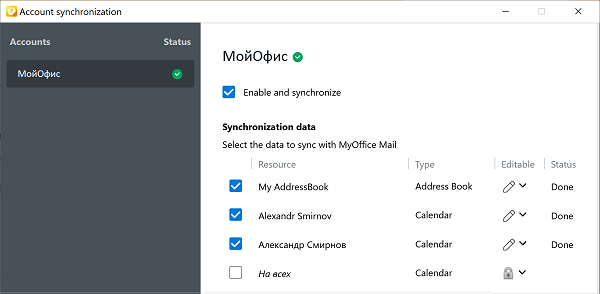
In the left pane of the window, select the necessary account, select the resources in the list and synchronize them with the server by clicking Synchronize now. If necessary, enable automatic synchronization by setting a period in minutes.
For additional actions with the account, click Actions for Account.
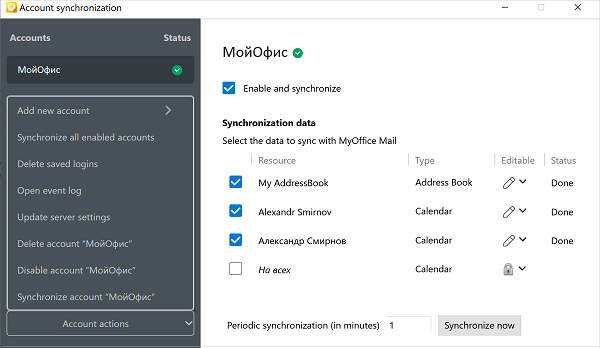
A pop-up menu opens with the following commands:
Add new account
Select Account actions > Add new account > CalDAV & CardDAV to add new account based on CalDAV and CardDAV services. Select Account actions > Add new account > Exchange ActiveSync to add new account based on Exchange ActiveSync services. |
Synchronize all enabled accounts
Select Account actions > Synchronize all enabled accounts. Data of all accounts will synchronozed with server. |
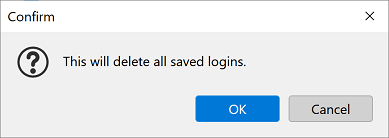
Delete saved logins
To remove all saved accounts select Account actions > Delete saved logins. Next dialog box will appear on the screen.
Click OK to remove all saved accounts. Click Cancel to close dialog window. |
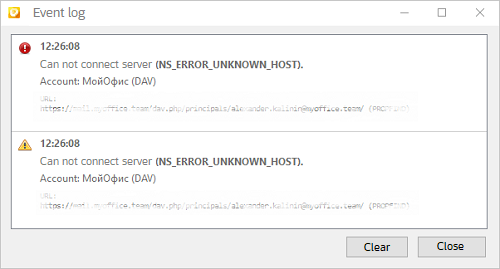
Open event log
Select Account actions > Open event log. A dialog box will open on the screen containing a list of error situations, for example, server connection errors.
|
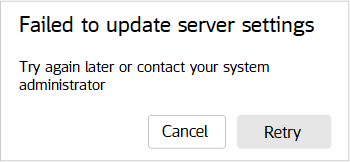
Update server settings
When significant changes occur on the mail server (for example, changing the domain), you must update the global settings of the server. For this purpose, the possibility of self-updating the server configuration by the user has been added. It is assumed that the user is aware of the need to update the server settings in advance. To update server settings select Account actions > Update server settings. In this case, a request is made to the server and the configuration is received. If the request was successful, then synchronization will start after the update. If an error occurs, a window appears on the screen.
Press Retry button for re-request the server and wait for its execution. Press Cancel to close dialog window. |
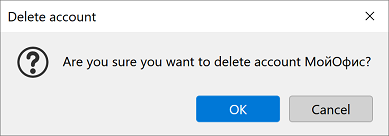
Delete account
Select Account actions > Remove account. Next dialog box will appear on the screen.
Click OK to remove account. Click Cancel to close this dialog. |
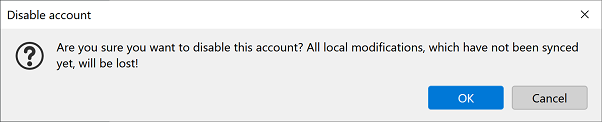
Disable account
Select Account actions > Disable account. Next dialog box will appear on the screen.
Click OK to disable account. Click Cancel to close this dialog. |
Synchronize account
Select Account actions > Synchronize account. Will synchronized all data checked in list. |