Create new calendar
To create a new calendar, do one of the following:
•On the Menu Bar, select File > New > Calendar.
•Open the calendar toolbar, click the  MyOffice Mail menu button on it. In the menu that appears, select New > Calendar.
•On the left side of the calendar pane, open the context menu and select New Calendar.
•Double-click the left mouse button in the free area of the left part of the calendar pane.
•On the header of the calendar list, click  New Calendar.
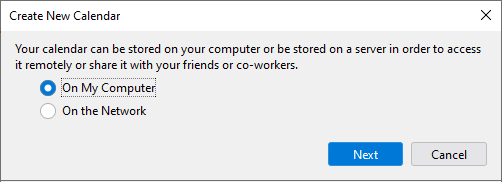
A calendar creation dialog box will appear on the screen. Select the location of the calendar (On My Computer, On the Network).
Create a local calendar
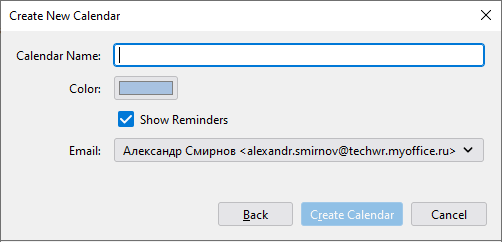
To create a local calendar, select On My Computer, then click Next. In the dialog box that appears, specify: •Calendar name •Calendar events color •Reminders settings •Email address
After clicking the Create Calendar button, the new local calendar will be added to the list of existing calendars. |
Subscribe to calendars on the network
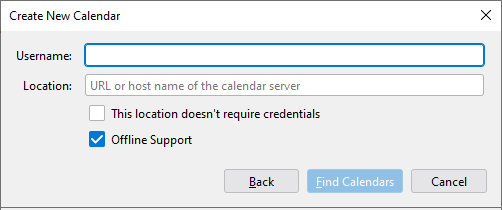
To subscribe to a calendar on the network, select On the Network, then click Next. In the dialog box that appears, specify: •Username •Server URL •Credentials available •Search for a local or network calendar
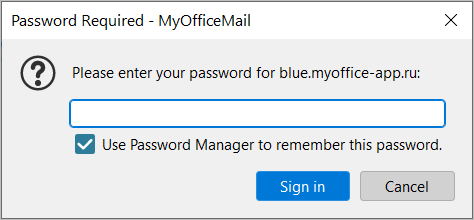
After clicking the Find Calendars button, a password entry dialog box will appear on the screen.
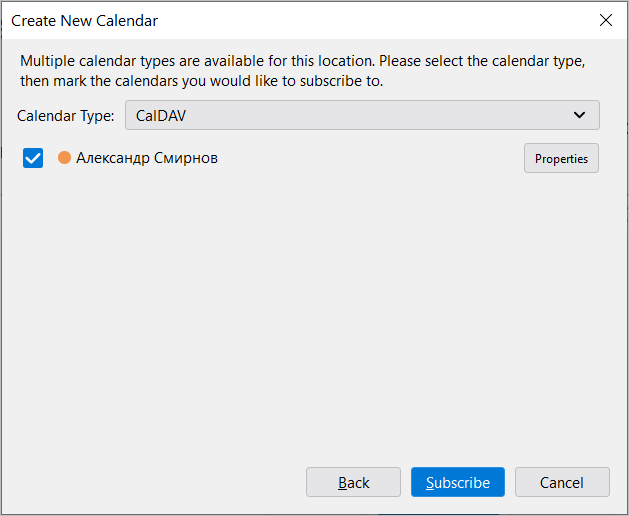
After entering the password and clicking the Sign in button, the list of available calendars will be displayed. To view the calendar properties, click the Properties button, the Calendar Properties dialog box will be displayed.
To subscribe to calendars, select the desired names from the list and click Subscribe. The set of selected calendars will be added to the list of existing calendars. |
