Create an event
One way to create a new event is to use the calendar graphic user interface. To create a new event, follow these steps:
1.Open the calendar by selecting the Menu Bar item Events and Tasks > Calendar.
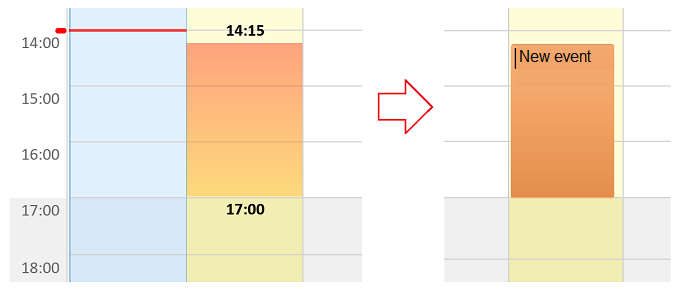
2.Select the desired date and time of the start of the event. Left-click the selected point.
3.Without releasing the left mouse button, drag the pointer down until the expected end time of the event. As the mouse moves, the event area will be displayed on the screen, as well as the start and end marks of the selected period.
4.Release the left mouse button at the point of the expected end time of the event. An event with an active edit field will appear in the calendar. Enter the event name and press Enter.
Proceed by editing the parameters of a new event.
In addition, there are several other ways to create a new event:
•On the Menu Bar, select Events and tasks > New Event.
•On the Toolbar, click the  MyOffice Mail menu button. In the displayed menu, select New > Event.
•On the Toolbar, click  .
.
•On the Menu Bar, select Events and Tasks > Calendar. Then, in the calendar that opens, select a day, open the context menu and select New Event.
•On the Menu Bar, select Events and Tasks > Calendar. In the calendar that opens, select a day and double-click. A new event will be created in which the date will already be set in accordance with the selected position in the calendar, and the calendar will correspond to the selected one.
•Click  on the Events and Tasks pane on the right side of the calendar.
•Press Ctrl+I/⌘Cmd+I.
•To create an event based on a message, select a message from the list, open the context menu, and select Convert to > Event.
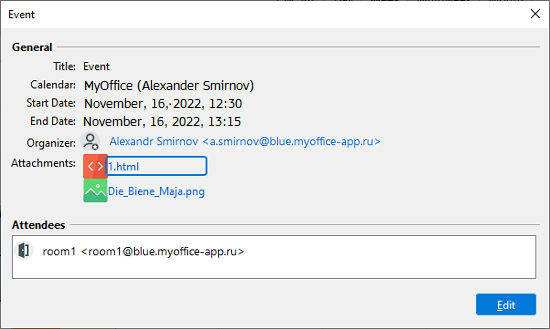
A dialog pane for creating/editing an event will be displayed on the screen.
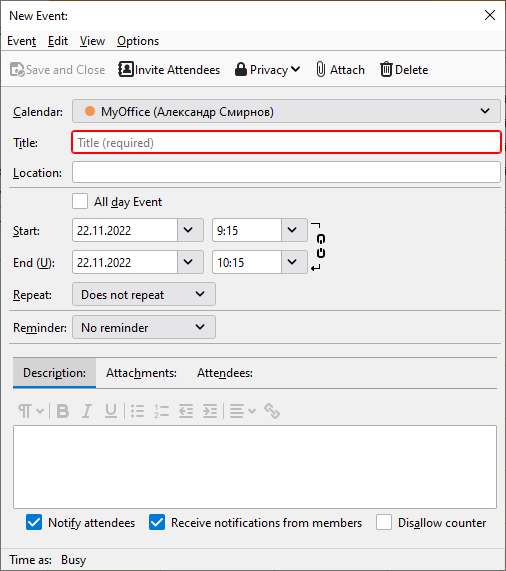
When you create a new event, by default, the calendar that is currently selected as the current one is substituted in the Calendar field.
On the dialog pane, select Event settings:
Start and end of the event
If necessary, you can link the values of the fields Start and End in order that when the end date of the event changes, the start time is shifted taking into account the duration of the event. In order to link these fields, click on the symbol indicating the linking of fields Start and End.
If the link is enabled, when changing the value of one of the fields, the value of the second one will be automatically adjusted.
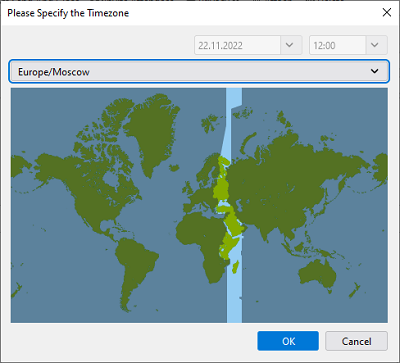
On the Menu Bar, select Options > Show Timezone. For the Start and End fields, the time zone values will be displayed.
Click the time zone label. A pop-up menu will appear on the screen containing a list of recently selected time zones. Select More Timezones to choose a different time zone.
|


Event recurrence
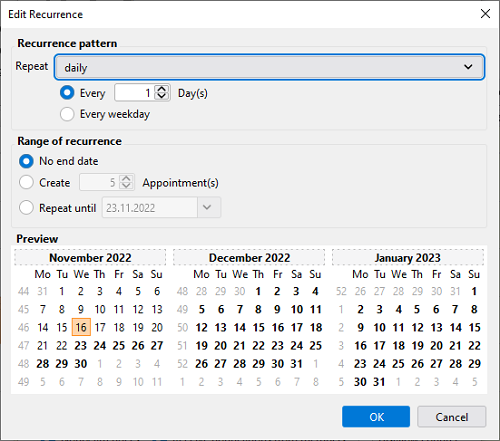
In the Repeat section, select the desired value from the list of the following options: •Does not repeat •Daily •Weekly •Every Weekday •Bi-weekly •Monthly •Yearly For more detailed settings in the same menu, select Custom. A dialog pane for setting the event recurrence will be displayed on the screen.
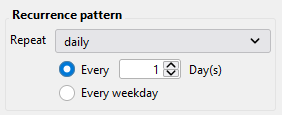
Set the frequency of the event. Depending on the selected option, an additional settings pane will be displayed. When you select Repeat Daily, additional control elements appear on the screen allowing you to select the frequency of days (each specified day), or each day of the week.
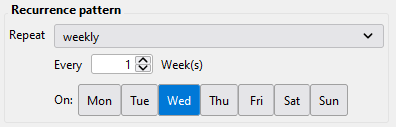
When you select Repeat Weekly, additional control elements appear on the screen allowing you to select the frequency of weeks (each specified week), as well as the days of the week on which the event should occur.
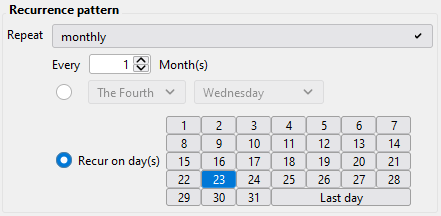
When you select Repeat Monthly, additional control elements appear on the screen allowing you to select the frequency of months (each specified month), as well as either each specific day of the week or specific days of the month on which the event should occur.
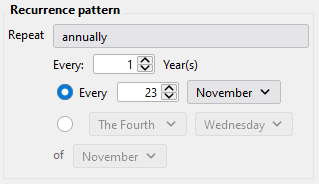
When you select Repeat Annually, additional control elements appear on the screen allowing you to select the frequency of years (each given year), as well as either each specific day of the week or specific days of the month on which the event should occur.
With any change in the frequency parameters on Preview pane, the days on which this event will be repeated will be highlighted. |
Invite event attendees
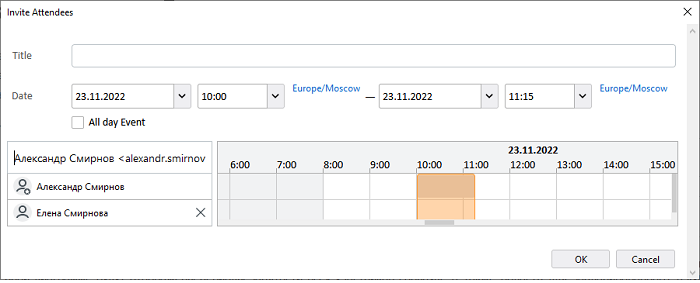
In order to invite attendees to an event, do one of the following on the Edit Event pane: •Click •On the pane with the list of event attendees, open the context menu and select Invite Attendees. •Select the menu item Settings > Invite Attendees. A dialog box for editing the list of attendees of the event will appear on the screen.
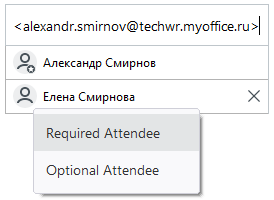
To invite an event attendee, start typing their name in the input field, select the desired contact in the list that appears, and press Enter. The attendee will be added to the list. The time chart will display the busy periods of all event attendees, as well as the area for the scheduled current event. If one of the attendees is busy, move the event frame with the mouse cursor, or change the start and end times in the corresponding input fields. When you finish editing the list of attendees, click OK. To delete an event attendee, click It is possible to assign roles to invited attendees (mandatory, optional). To change the role, click on the user icon. A pop-up menu with a role selection will appear on the screen where you can select Required Attendee / Optional Attendee. After selecting a role, an optional attendee of the event will be marked as
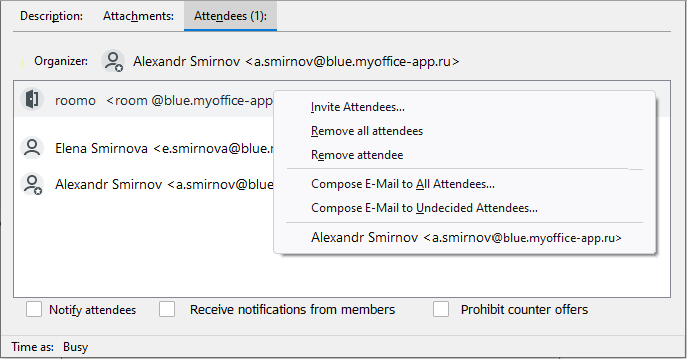
The list of attendees will be updated in the event editing dialog on the Attendees tab. The context menu of this pane allows you to change the list of invited participants, as well as create messages for them.
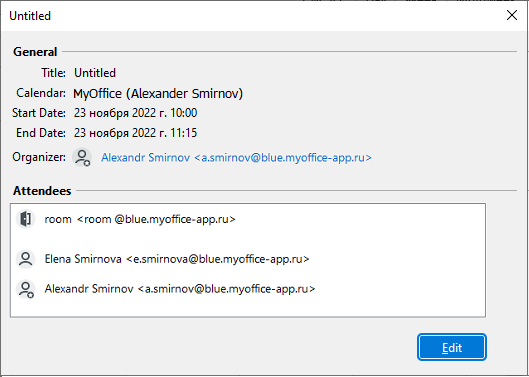
The list of participants of the event will also be displayed in the event properties display pane. The order of event attendees is as follows: •Organizer. •Resources (rooms). •Attendees. If an attendee is made optional, it moves down in the list below all attendees. •Optional Attendees. •Mailing groups (mandatory, then optional). •External participants.
|


Set up event privacy
To configure the privacy of an event, do one of the following on the event editing pane: •Select the menu item Options > Privacy. •Click In the list that appears, select the type of privacy based on the following options: 1.Public Event 2.Show Time and Date Only 3.Private Event |

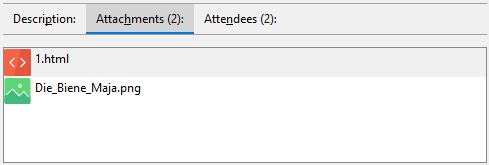
Add an attachment to an event
You can add attachments to an event. Types of attachments: •File •Link to a web page To attach a file to an event, click To attach a web page to an email, select one of the following methods: •Select the menu item Options > Attach > Webpage. •In the Attachments pane, open the context menu, then select Attach a webpage. In the dialog box that opens, enter the address of the web page, it will be displayed in the Attachments pane.
By right-clicking on the attachment name, a context menu appears on the screen containing the following elements: •Open: The file will be opened in the corresponding application, the link to the web page will open in the system browser. The same will happen when you double-click the attachment. •Save: A system dialog for saving the attachment to disk will open. •Copy Link Location: The link to the attachment will be copied to the clipboard. •Remove: The attachment will be removed from the event. •Remove All: All attachments will be removed from the event. The event view pane also displays a list of attachments. When you click on an attachment, depending on its type, either a file or a link will open in the system browser.
|

Add a conference
You can add a conference to the event. To do this, click Add Conference and in the drop-down menu, select a service to hold it. The list of third-party services depends on the integration with third-party videoconferencing. After selecting a service, the message that the conference is added will appear. The link will be automatically added when the event is created. You can manage the conference link. To copy the link, click |


Delete an event
To delete an event, click |

Event priority
To set the priority of an event, on the event editing pane, select Options > Priority. In the list that opens, select one of the priority options: 1.Low 2.Normal 3.High |
Event status
To set the event status, on the event editing pane, select Options > Status. In the list that opens, select one of the status options: 1.Not specified 2.Tentative 3.Confirmed 4.Canceled |
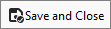
Save an event
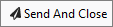
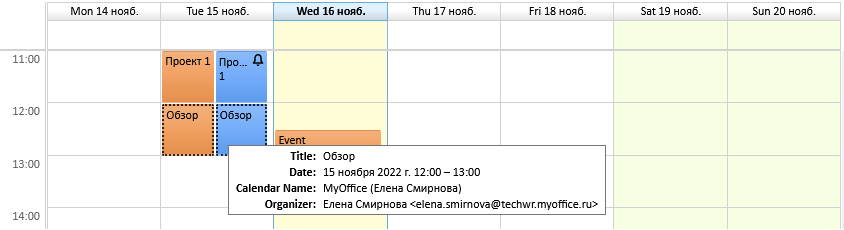
To save a new event on the event editing pane, select the menu item Event > Save. To save the event and close the dialog, select the menu item Event > Save and Close, or click If a previously existing event is being edited, in order to save and submit the changes, select the menu item Event > Save and Send. To save the event and close the dialog, select the menu item Event > Send and Close, or click After the event is successfully updated, it will be displayed in the calendar at the position corresponding to the date and time of the event. When the mouse cursor hovers over an event, a pane with a brief description of the event appears on the screen.
|