Special characters window
To open the Special characters window, follow these steps:
1.Place the cursor at the location on the slide where you want to insert the special character.
2.Do one of the following:
•On the Insert tab, click  Special characters.
•On the Insert tab, click the arrow to the right of the Special characters button. In the special characters quick insert pane, select More characters.
•When working in macOS, run the Insert > Special characters command from the command menu.
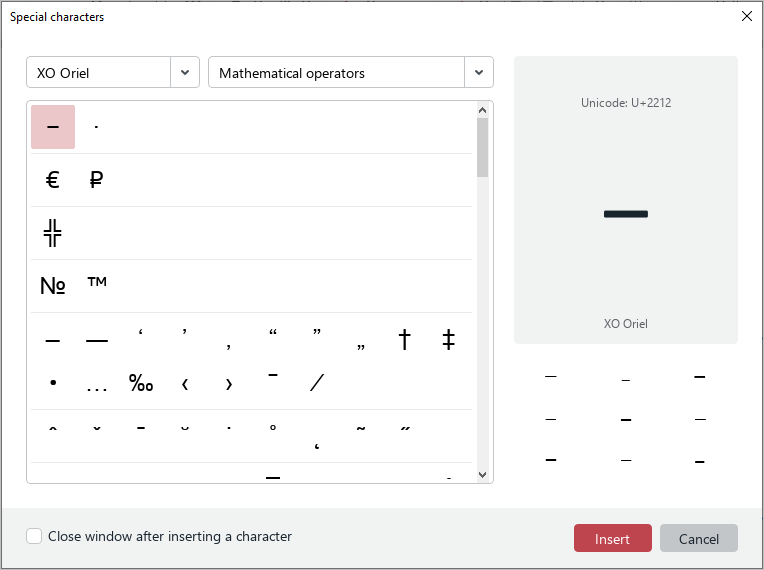
The Special characters window contains the following tools:
–Drop-down list for selecting the font of the special character.
–Drop-down list for selecting the group and category of the character. If the font does not support the characters of a group or category, it is not displayed in the list.
–Characters. By default, the first character of the selected category is highlighted. Categories are separated from each other by a line.
–The name of the highlighted character.
–The code of the selected character in the Unicode system.
–The typeface of the selected character.
–The font of the selected character.
–Other typefaces of the selected character.
To insert a character from the Special characters window, follow these steps:
1.Select the font of the special character. The selection is similar to the font selection in the main application window.
2.Select a character category. You can select it in the same way as selecting a special character font.
3.Insert the character in one of the following ways:
•Select the character by double-clicking.
•Select the character with a single click and click Insert.
•Select a character with one mouse click and press Enter or Space on the keyboard.
If you want the window to close automatically, select the Close window after inserting a character checkbox.
To close the Special characters window manually, click Cancel or the  button in the window header.