Insert in a message
Link
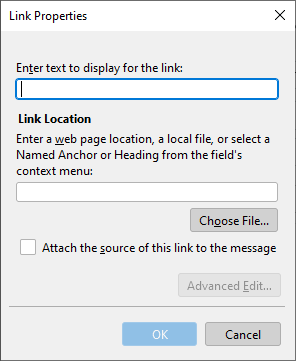
To insert a link, choose Insert > Link from the message Menu Bar, or choose Link object in the email formatting pane. The Link Properties dialog box opens.
To create a link, you must enter the text to display, as well as the link address. The address can be the address of a web page, the path to a file on disk, as well as an anchor or title with a name from the context menu of the field. To select a file from disk, click Choose File button. After selecting the file, the link to it will be registered in the link address field. Click the Attach the source of this link to the message check box, if you want the file at the link address to be attached to the email. |
Anchor
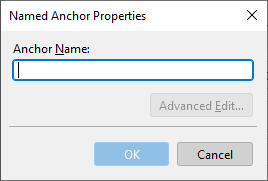
To insert an anchor, in the Menu Bar, select Insert > Named Anchor. Or in the message formatting pane, select embedding an object Anchor. A dialog box for editing anchor properties will appear on the screen.
To insert an anchor, enter its name (description) in the field Anchor Name. If a text fragment is selected in the message at the time of opening the dialog box, it will be placed in the field Anchor Name. When you click Advanced Edit, a dialog box for editing additional properties opens on the screen. By pressing OK, an anchor will be added to the pointer position. |
Image
To insert an image, in the Menu Bar, select Insert > Image, or in the message formatting pane, select embedding an object Image. When inserting an image, a dialog box opens consisting of the following bookmarks: Location The Location tab allows you to upload an image and configure image properties. The following fields are used for this: •Image Location: Image location input field. This can be a link to a web resource, or the address of a local file. By clicking Choose File, the system file selection dialog opens. •Tooltip: A tooltip that appears when you hover the pointer over the image. •Alternate text: Alternative text for the image (text that allows you to get information about the image when the image display is disabled in the browser or while they are loading).
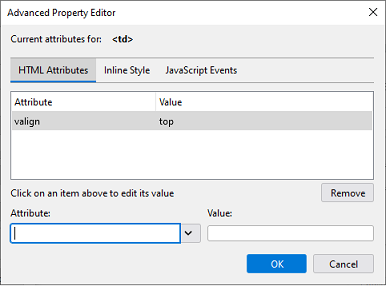
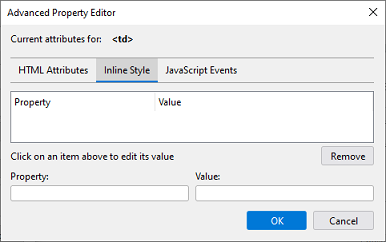
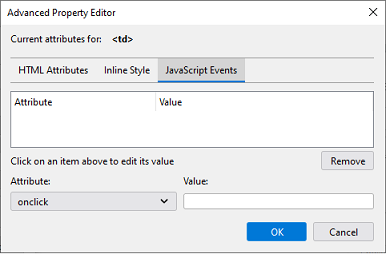
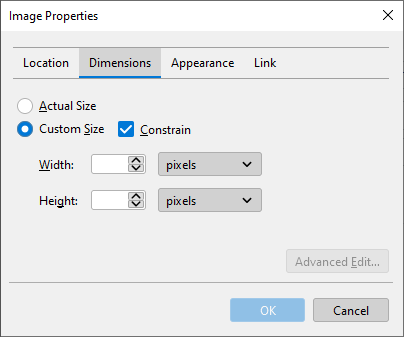
When you click Advanced Edit, a dialog box for editing additional properties opens on the screen of the image. By clicking OK, the selected image will be added to the pointer position. Dimensions The Dimensions tab allows you to control the size of the image. When choosing Actual Size, the image opens without resizing. Select Custom Size if you want to resize the image. At the same time, you can set the width and height in pixels according to your preference and percentages of the window width. Select Constrain, if you want to keep the original proportions of the image.
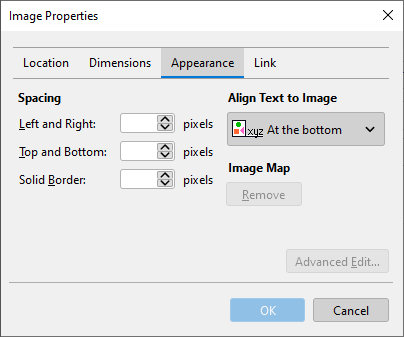
When you click Advanced Edit, a dialog box for editing additional properties opens on the screen of the image. By clicking OK, the selected image will be added to the pointer position. Appearence The Appearance tab allows you to set the properties of the margins and the position of the image relative to the text.
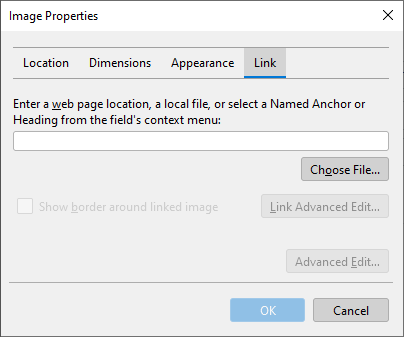
Field properties are set in pixels, you can set the following options: •Left and right •Top and bottom •Solid border The type of image alignment is set based on the following options: •At the top •In the center •At the bottom •Wrap to the left •Wrap to the right When you click Advanced Edit, a dialog box for editing additional properties opens on the screen of the image. By clicking OK, the selected image will be added to the pointer position. Link The Link tab is designed to open a link, anchor, or title when you click the image. The link must be entered in the input field. When you click Advanced Edit, a dialog box for editing additional properties opens on the screen of the link.
When you click Advanced Edit, a dialog box for editing additional properties opens on the screen of the link. By clicking OK, the selected image will be added to the pointer position. Double-clicking the link opens the Edit Link Properties dialog box. |

Horizontal line
Table
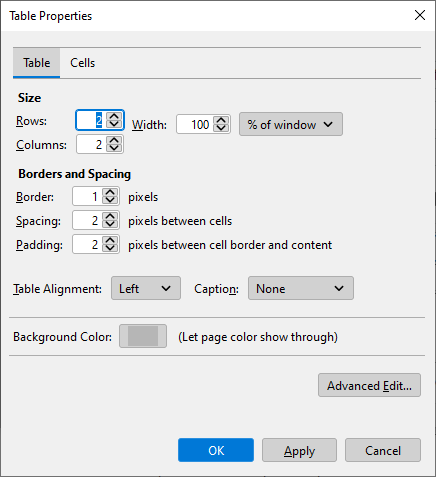
To insert a table, select the Menu Bar item Insert > Table. Or in the message formatting pane, select embedding an object Table. If a text fragment is not highlighted in the email at the time of table insertion (pointer mode), the table insertion dialog box opens.
The dialog allows you to set the following table parameters: •Number of rows •Number of columns •Table width (in pixels or as a percentage) •Thickness of the table borders in pixels When you click Advanced Edit, a dialog box for editing additional properties opens on the screen of the table. After creating the table, you can change its parameters. To do this, double-click the table. The editing dialog opens. The dialog box that opens will be different from the table creation window. It contains two panes: Table and Cell. The Table tab contains fields for editing table properties. •Number of rows •Number of columns •Table width •Border width •Margins between cells •Cell field sizes •Horizontal alignment type •Caption •Background color When you click Advanced Edit, a dialog box for editing additional properties opens on the screen of the table.
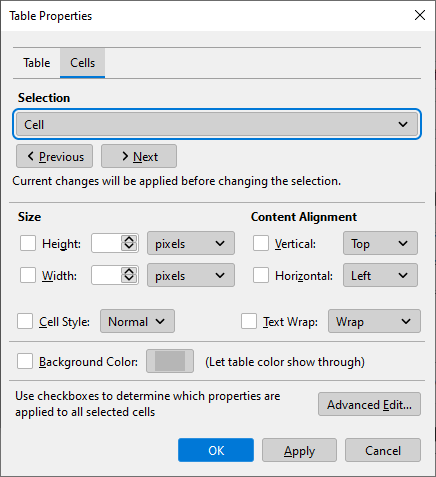
The Cell tab contains fields for editing table cells properties. •Cell height •Cell width •Horizontal alignment of cell contents •Vertical alignment of cell contents •Cell style •Text wrapping in a cell •The background color of the cell When you click Advanced Edit, a dialog box for editing additional properties opens on the screen of the cell.
|


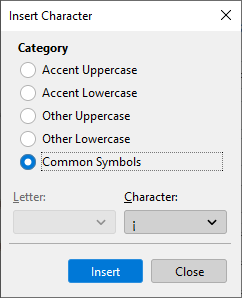
Characters and symbols
Insert or edit a table of contents
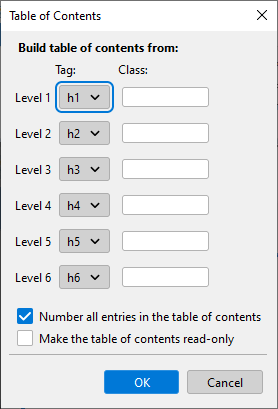
To insert a table of contents, in the message Menu Bar, select Insert > Table of Contents.
If necessary, describe the rules for how the content levels are generated and click OK. |