Create a contact
To create a contact, do one of the following:
•On the Menu Bar, select File > New > Address Book Contact.
•On the Menu Bar, of the address book, select File > New > Address Book Contact.
•On the address book Toolbar, click  .
.
•On the pane with the list of address books, open the context menu and call the command New Contact.
•Press the keyboard shortcut Ctrl+N/⌘Cmd+N on the keyboard.
•To add a contact when viewing an incoming/sent message, follow these steps:
1.In the viewing area of the message, right-click the email address that you want to add to the address book.
2.Run the context menu command Add to Address Book. If the contact is already in the address book, this command will not be in the context menu.
A dialog pane for creating a contact will appear on the screen, consisting of the following bookmarks:
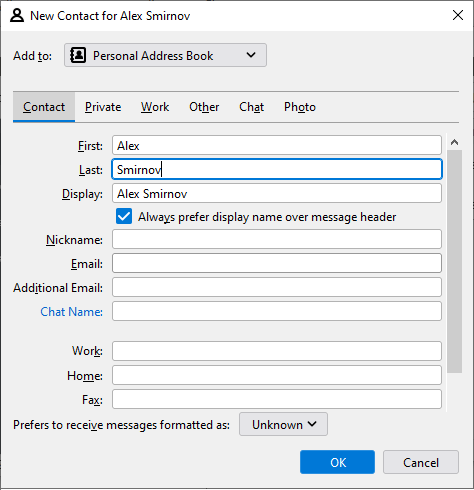
General contact information
On the Contact editing tab, fill in the following fields: 1.First, Last, Display 2.Nickname 3.Email and Additional Email 4.Chat Name 5.Prefers to receive messages formatted as 6.Phone numbers: Work, Home, Fax, Pager, Mobile
|
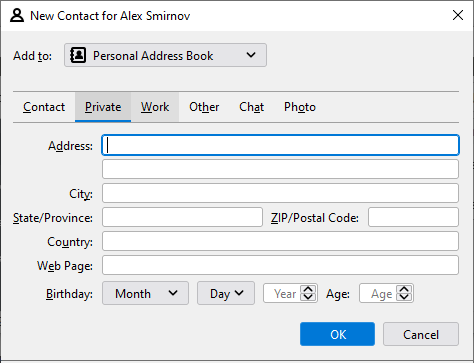
Personal information of the contact
On the Private editing tab, fill in the following fields: 1.Address 2.City 3.State/Province 4.Country 5.ZIP/Postal Code 6.Web page 7.Birthday
|
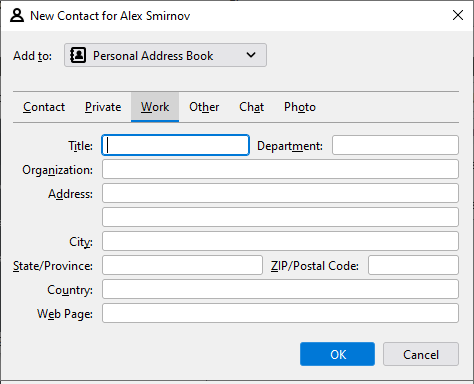
Work information of the contact
On the Work editing tab, fill in the following fields: 1.Title, Department, Organization 2.Address 3.City 4.State/Province 5.Country 6.Web page
|
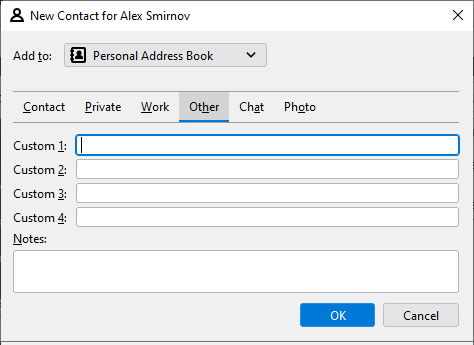
Other contact information
On the Other editing tab, fill in additional fields and notes.
|
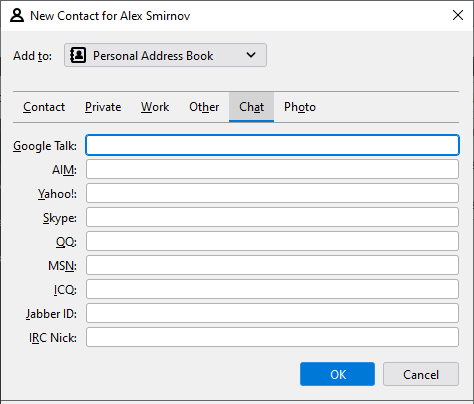
Chat settings
On the Chat edit tab, fill in the following contact IDs in the chats: 1.Google Talk 2.AIM 3.Yahoo! 4.Skype 5.QO 6.MSN 7.ICQ 8.Jabber ID 9.IRC Nick
|
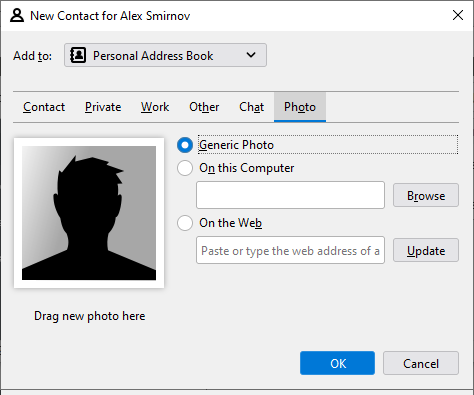
Photo
In the Photo edit tab, select an image to use for your contact's avatar: 1.Generic Photo. 2.Select a photo from your computer's local drive. 3.Select a photo from the web. You can also drag a photo from the system window to the Photos dialog box.
|