Cell borders
Change border parameters
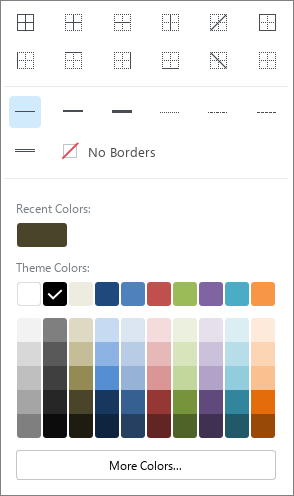
By default, when you create a document, there are no borders between cells. The grid, visible on the sheet, conditionally separates cells from each other to make working with data easier, and is not displayed when printing. To add borders to cells, or to change settings previously applied to borders, follow these steps: 1.Select the cell or range of cells whose borders need to be changed. 2.On the Toolbar, in the Cells section, click the arrow to the right of the 3.In the window that opens, in the first block of settings, specify the position of the borders you need to change the parameters of. 4.In the second block of settings, select the type of line to be applied to the specified borders. 5.In the third block of settings, select the line color using one of the following methods: •Select the appropriate color in the Recent Colors block. This block displays the last five colors that were applied to the borders of the tables before. •Select the appropriate color in the Theme Colors block. This block displays the color palette of the theme of the current document. •Click More Colors. In the Select Color window that opens, specify the desired color as a HEX code or in RGB format and click ОК.
Border settings window To quickly apply the last selected border style to a cell/range of cells/table, follow these steps: 1.Select the desired cell or range of cells. 2.On the Toolbar, in the Cells section, click |
Delete borders
To delete the borders of a cell/range of cells/table, follow these steps: 1.Select the desired cell or range of cells. 2.On the Toolbar, in the Cells section, click the arrow to the right of the 3.In the window that opens, configure the desired parameters: •In the first block of settings, specify the place where the borders are to be deleted. •In the second block of settings, select No Borders. |
 button.