Edit the text of an email
The text of the email is entered, edited, and formatted in the New message window. To perform these actions, use the formatting pane tools:

Undo and redo the action
The The |


Change the font and color of the text
Font style The font style (or type face) affects the display of letters: the weight of the lines, the roundness of the letters, etc. The font style is not set by default. The buttons Font The font used to create the letter can be changed. To do this, select the text with the mouse, click on the font name field and select the desired font from the drop-down list. Font size The font size can be reduced or increased if desired. To do this, select the text with the mouse, click on the font size field and select one of the preset sizes from the drop-down list. Text and background color The You can set the font, its style, size, color and background color before you start typing: the text that will be entered after changing the settings will have the specified characteristics.
|


Format a list
Numbered list Numbered lists are lists in which items are marked with numbers. When you press the Bulleted list Bulleted lists are lists in which items are marked using various symbols. When you click the |


Format a quote
The When forwarding an email or responding to an email, the text of the forwarded email or the email to which the response is given is framed with a quote automatically in the new email.
To make a quote, you can use the To use the 1.Place the cursor in the place of the email where the quote should be. 2.Press the 3.Copy the text you want to quote. 4.Paste the copied text into the line with the quote symbol. To use the 1.Copy the text you want to quote. 2.Paste the copied text into the desired place in the text of the email. 3.Click the •If some part of the text was highlighted before clicking the •If there was no highlighted text, the paragraph in which the cursor is located will be formatted as a quote.
When working with text formatted as a quote, the following functions may be useful: •When the Enter key is pressed, the cursor moves to the next line, the quotation ends. •When adding a new quotation block immediately after an existing quotation, the blocks will be formatted with separate quotations. To combine quotations located side by side into one, place the cursor at the beginning of the second quotation and press the key: one quotation mark remains, the text of the second quotation will continue from the same line as the text of the previous quotation. •To split a quote into several, place the cursor at the place where the quote is divided and press Enter. •To cancel the quotation, select the text of the quotation (partially or completely) or place the cursor in the line with the quotation by clicking the •If the cursor is in the text with the quotation, then the
|

Insert a link
The To insert a hyperlink into the text, do the following: 1.Click 2.Enter the URL in the URL field. 3.If the text fragment was not highlighted before clicking the 4.Click the Insert button. A hyperlink will be added to the text of the message.
To change or delete a hyperlink, do the following: 1.Left-click the hyperlink. The menu opens:
2.Select the icon of the desired action (Click the link, Edit the link or Delete the link).
|

Insert an image
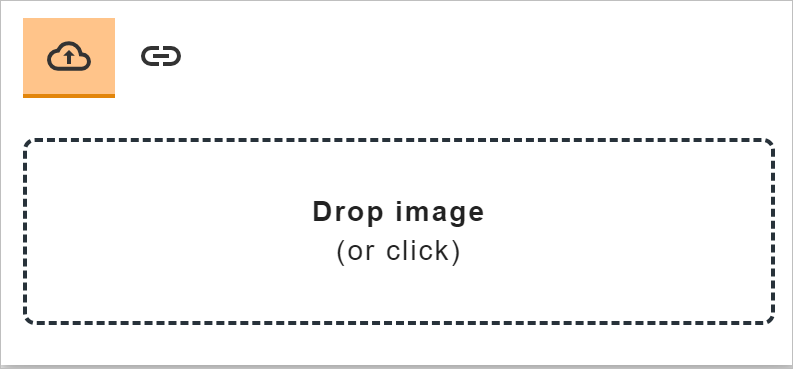
The To insert an image into an email, do the following: 1.Click the 2.In the window that opens, do one of the following: •To insert an image from a file, select the Drop image icon. Drag the desired image into the field with the mouse, or left-click on the field and select the desired file on the fixed or external media on the user's device:
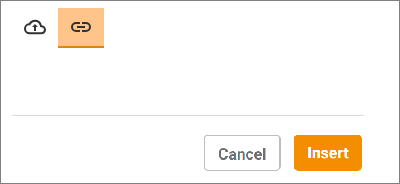
•To insert an image that has a link, select the Insert link icon. After that, enter the address of the image in the field. After entering the address, click the Insert button:
You can also insert an image into the text of an email from the system clipboard (using Ctrl+V keyboard shortcut) or by dragging the desired file from the system window of the user's device to the desired location of the message text. The images embedded in the text of the email are displayed not as attached files, but as part of the text. Emails that contain only images embedded in the text do not have an indication of an attachment Embedded images can be edited using special menu tools or text editing tools. For example, you can drag an element to another place in the message by holding down the mouse cursor, or delete it using the Delete or Backspace keys by placing the cursor before or after the element, respectively. |


Edit embedded elements
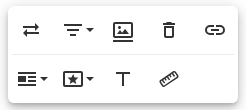
The elements embedded in the text of the email can be edited. The menu for working with an element opens when you click on the element with the left mouse button:
The following functions are available in the element menu: •Replace the image (drag a new image from the system window to the file attachment form). •Select the alignment type. •Add a signature. •Delete an image. •Insert a link. •Select the way the image is positioned (with text wrapping or line break). •Set the type of outline formatting (rounded, shaded, and/or with visible borders; multiple-choice selection is possible). •Set an alternative text (text that allows you to get information about the image when the image display is disabled in the browser or when they are downloaded). •Change the size of the image. |
Clear formatting
The •Font •Font style •Font size •Font color •Background color of the font |
