Cell borders
By default, there are no borders between cells when you create a file. The grid, which is visible on the sheet, separates the cells from each other to make data processing easier and does not appear when printing.
To add cell or range borders:
1.Select the cell or a range of cells that you want bordered.
2.On the Toolbar, click the arrow to the right of the  All borders button.
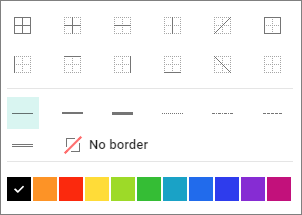
3.In the opened menu, set the desired parameters:
•In the first section, specify the position of borders.
•In the second section, specify the type of borders.
•In the third section, specify the color of borders.
You can also choose which borders must be displayed using the Command menu. Select Table > Borders (No borders, All borders, Outside borders).
on the Toolbar.To delete the set borders of a cell or range:
1.Select the cell or a range of cells you want to remove the borders of.
2.On the Toolbar, click the ![]() button to the right of All borders.
button to the right of All borders.
3.In the first section of the opened menu, specify which borders you need to delete and click No borders in the second section.
If the No border type is selected in the first or second section, the cell borders are displayed as light gray lines. These lines conditionally divide cells and simplify working with the table. Conditional cell borders are not displayed when printing and exporting the document to .pdf format.