Alignment and spacing
Horizontal alignment
You can align text within an object horizontally in the following ways: •To the left edge of the object •To the center of the object •To the right edge of the object •Justify: Along the left and right edges of the object •Evenly horizontally distributed within the object To align text horizontally, follow the steps below: 1.Select the text for which you want to adjust the alignment: •To align a single paragraph, select that paragraph/part of that paragraph or place the cursor in it. •To align multiple paragraphs, select them in their entirety. •To align all text within an object in color, select the object or select all text within the object. 2.Run one of the commands shown in the table below.
Horizontal alignment takes place within the indents specified for the paragraph being edited. If the text in a cell is rotated, horizontal alignment is carried out according to its position in space: the text is moved relative to the upper and lower cell borders. |
||||||||||||||||||||||||||||||||


Vertical alignment
You can vertically align text inside an object: along the top, in the middle, or along the bottom. To do this, follow these steps: 1.Select the object where you want to align the text: •To align text within any object other than a table, select the object with a single or double click. •To align text in a table, select it with a single click. •To align text in one or more cells in a table, select those cells. 2.Run one of the commands shown in the table below.
If the text in a cell is rotated, vertical alignment is carried out according to its position in space: the text is moved relative to the left and right cell borders. |
Line spacing
Line spacing is the space between each line in a paragraph. The default line spacing multiplier for all text is 0.90. If necessary, you can change the line spacing. You can select a line spacing value from predefined values or specify your own. Predefined spacing When you select a predefined value, the line spacing is equal to the product of the font size by the specified value. For example, if you use 12 pt font and double line spacing for the paragraph, the line spacing in the paragraph is 24 pt (12 pt x 2). To set a predefined line spacing, do the following: 1.Select the text fragment you want to format. •To set a predefined spacing for a single paragraph, select that paragraph/part of that paragraph or place the cursor in it. •To set a predefined spacing for multiple paragraphs, select the entire paragraph. •To set a predefined spacing for all text within an object, select the object or select all text within the object. 2.On the Toolbar, in the Paragraph section, click the button that displays the current spacing value. For example, 3.In the list that opens, select the desired predefined value. Custom spacing To set a custom line spacing, do the following: 1.Select the text for which you want to set a custom spacing: •To set a custom spacing for a single paragraph, select that paragraph/part of that paragraph or place the cursor in it. •To set a custom spacing for multiple paragraphs, select the entire paragraph. •To set a custom spacing for all text within an object, select the object or select all text within the object. 2.On the Toolbar, in the Paragraph section, click the button that displays the current spacing value. For example, 3.In the list that expands, click Custom Line Spacing. 4.In the Custom Line Spacing window, in the drop-down list on the left, specify the method of spacing calculation: •Multiply: Sets the line spacing which is increased or decreased according to the specified multiplier. A multiplier of 1.00 corresponds to a single line spacing. Select the multiplier greater than 1.00 to increase the spacing. For example, setting a multiplier to 1.2 will increase the space by 20%. Select the multiplier of less than 1.00 to reduce the spacing. For example, setting a multiplier to 0.7 will reduce the spacing by 30%. •Exact: Sets a fixed spacing equal to the value specified in the field on the right. The value is measured in points (pt). Unlike the predefined spacing, the fixed spacing is not changed when the font is reduced/increased. •At Least: Sets the minimum allowed spacing, equal to the value specified in the field on the right. The value is measured in points (pt). When you increase the font size or add characters to a line whose height differs from the main font (for example, superscript and subscript characters), the line spacing value is calculated automatically. 4.In the field on the right, enter the numeric value for the selected calculation method. 5.Click OK. |

Character spacing
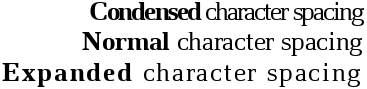
The character spacing allows you to set the spacing between the characters being entered into the text. You can choose between the following options: condensed, normal, and expanded character spacing. The figure below shows examples of how each of the spacings is displayed:
You can select the character spacing type using the Command menu or the Toolbar. To change the character spacing type using the Command menu, follow these steps: 1.Select the text you want to customize the character spacing: •To set the character spacing in a single word, place the cursor in the word or select the entire word. •To set the character spacing in a piece of text, select the entire text. •To set the character spacing for all text within an object, select the object or select all text within the object. 2.In the Format menu, select Font > Character Spacing. 3.In the sub-menu that opens, select the desired spacing type. To change the character spacing using the Toolbar, follow the steps below: 1.Select the text where you want to set the character spacing as described above. 2.On the Toolbar, in the Font section, click 3.Select the desired character spacing type:
|

Paragraph spacing and indents
To customize spacing and indentation for paragraphs, follow the steps below: 1.Select the required text: •To change the settings of a single paragraph, select that paragraph/part of that paragraph or place the cursor in it. •To change the settings of multiple paragraphs, select these paragraphs entirely. •To change the settings for all text within an object, select the object or select all text within the object. 2.On the Toolbar, in the Paragraph section, click 3.In the window that appears, enter the required numeric values for the following parameters: •First Line: The distance from the left border of the object to the first line in the paragraph. •Left Indent: The distance from the left border of the object to the paragraph. •Right Indent: The distance from the right border of the object to the paragraph. •Before: The spacing between the current paragraph and the previous paragraph. •After: The spacing between the current paragraph and the next paragraph. To quickly increase the paragraph indent by 1.25 cm, do one of the following: •In the Format menu, select Alignment > Increase Indent. •On the Toolbar, in the Paragraph section, click To quickly decrease a paragraph indent by 1.25 inch, follow one of the steps below: •In the Format menu, select Alignment > Decrease Indent. •On the Toolbar, in the Paragraph section, click |
