Create a new email
A new email can be created in one of the following ways:
•On the Navigation bar, click the New message button. The New message window opens.
•On the Navigation bar in the Application menu, select Write mail. The New message window will open in a new tab of the web browser.
•From another email received or sent earlier, when viewing it in the Reading pane or in a new tab (see reply to an email, forward an email).
•In the MyOffice Contacts section of the сontact сard or on the contact group page.
To prepare and send an email, follow these steps in the New message window:
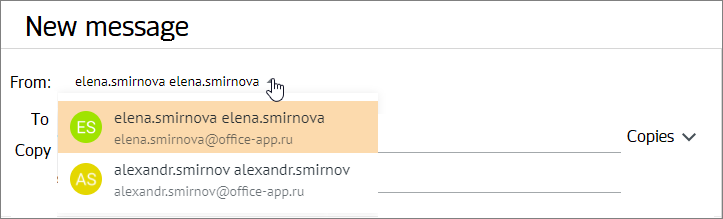
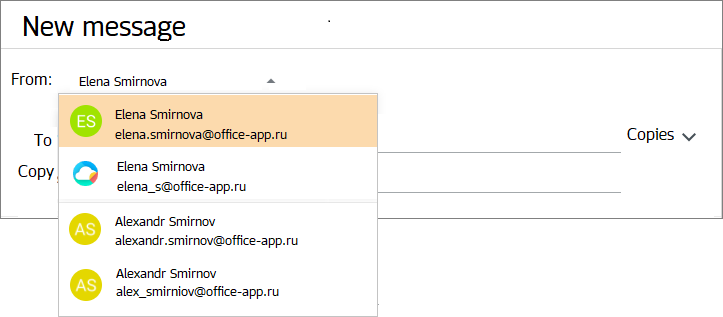
1.If the user has connected additional accounts or has additional aliases, select the sender's address in the From field.
2.In the To field, enter the address(es) (one or more) of the recipients of the email.
3.If needed, use the fields сс and/or bcc to fill in the addresses of the recipients of the email (one or more) to whom you want to send a copy and/or a bcc copy of the email.
4.Use the Subject field to describe the content of the email.
5.In the workspace, enter the text of the email. To enter and format text, use the tools in the formatting pane.
6.If needed, add attachments (attach files to the message).
7.If needed, specify the email priority and the level of sensitivity of the email and set up receiving the read receipt.
8.If needed, select a signature for the email.
9.Click the Send button.
New message window control buttons
• • • The minimized New message window is located at the bottom of the interface. The window can be expanded again or closed with saving the email to the Drafts folder using the corresponding buttons on the thumbnail of the minimized window:
|


From
To be able to send emails on behalf of another user (from another email address), you should connect this user's account to the current account. After that, when creating an email in the From field, you will be able to select the sender from the list of connected accounts:
In some cases, the user may need to send emails from different addresses within the same account. For example, it can be useful in the following cases: •Gaining additional privacy. •Customizing the receipt of emails with certain topics. •Sorting incoming messages by certain characteristics (mailings, news from companies). •Sending emails from an address other than your primary one. To do this, you can use mail aliases. Aliases are additional email addresses linked to the user's email account. Aliases are added by the system administrator and transmitted to the user via an email message with the following content: Administrator has added an email alias to you The list of available aliases is not displayed in the user's profile settings, but can be used when sending an email. If the user has additional aliases in addition to the main address, they are displayed in the drop-down list of the From field. Several accounts containing aliases are separated by a horizontal line.
Additional information about aliases: •To use aliases, log in to the application using the password and login of the main account. •Emails received simultaneously to the main address and to the addresses of aliases are displayed in the Inbox as one email. •If the user sent an email from an alias, the sender will be indicated as the mailing address related to the alias. •The account's avatar is used as the avatar. •Aliases use the profiles created for the main account. |
To
In the To field, enter the addresses of the recipients of the email (one or more). Recipient addresses are selected from the user's contact list or entered manually (for addresses that are not included in the account's contact list). After entering each address, press the Enter or Space key on the keyboard, or go to another field. If you enter several characters of the name or email address, the list of contacts of the current user containing the entered characters will be displayed. You can also paste a list of addresses that was copied to the clipboard when viewing an email, an event, or a group of contacts. Edit recipients To edit the entered address, double-click it with the left mouse button. To delete an address, click the Addresses can be dragged with the mouse within the field to change their order, as well as dragged with the mouse into and out of the cc and bcc fields. |

Carbon copies and blind copies
Carbon copies (cc) In many cases, it is necessary to send an additional email message to other recipients in addition to the primary recipients. In this case, the email addresses of additional recipients should be specified in the cc field. The users specified in the cc field receive an email for information purposes and are not the main participants in the discussion according to the sender's intent. The cc field is filled in and edited in the same way as the To field. Blind copies The recipients specified in this field will also receive the email, but the other participants in the discussion (the recipients specified in the fields To and cc) will not know about the fact of sending the email to this person (the data of the recipients of the bcc is not displayed in the list of recipients of the email). Oftentimes hidden copies are used in mass mailing so that all other recipients cannot find out which other users are in your address book. You need to enter the email addresses of the users to whom the bcc is intended in the bcc field. The field is filled in and edited in the same way as the To field. The cc and bcc fields can be hidden by clicking the Copy |

Title
The Subject field should describe the contents of the email. The subject makes it easier to process emails, as it is visible before opening the email along with the date and the sender. The subject is entered manually from the keyboard in any form. |
Keyboard shortcuts
For keyboard shortcuts that can be used when working in the New message window, see the Keyboard shortcuts section. |