Create a new event
To create a new event, use one of the following methods:
•Click the  button located on the Navigation bar of the MyOffice Calendar section.
•Left-click any day/hour in the calendar grid of the workspace section of MyOffice Calendar.
•Click  /
/  Application menu and select Create meetup.
•In the Contacts list, select a contact, and then click Create event in the contact details pane.
The window for creating a new event will open. If the event was created from the MyOffice Mail or MyOffice Contacts section, a new web browser tab will open with the MyOffice Calendar section and the new event creation window open.
The window of creating a new event has the following tabs: Details, Schedule, More options. To switch from one tab to another, left-click its name:
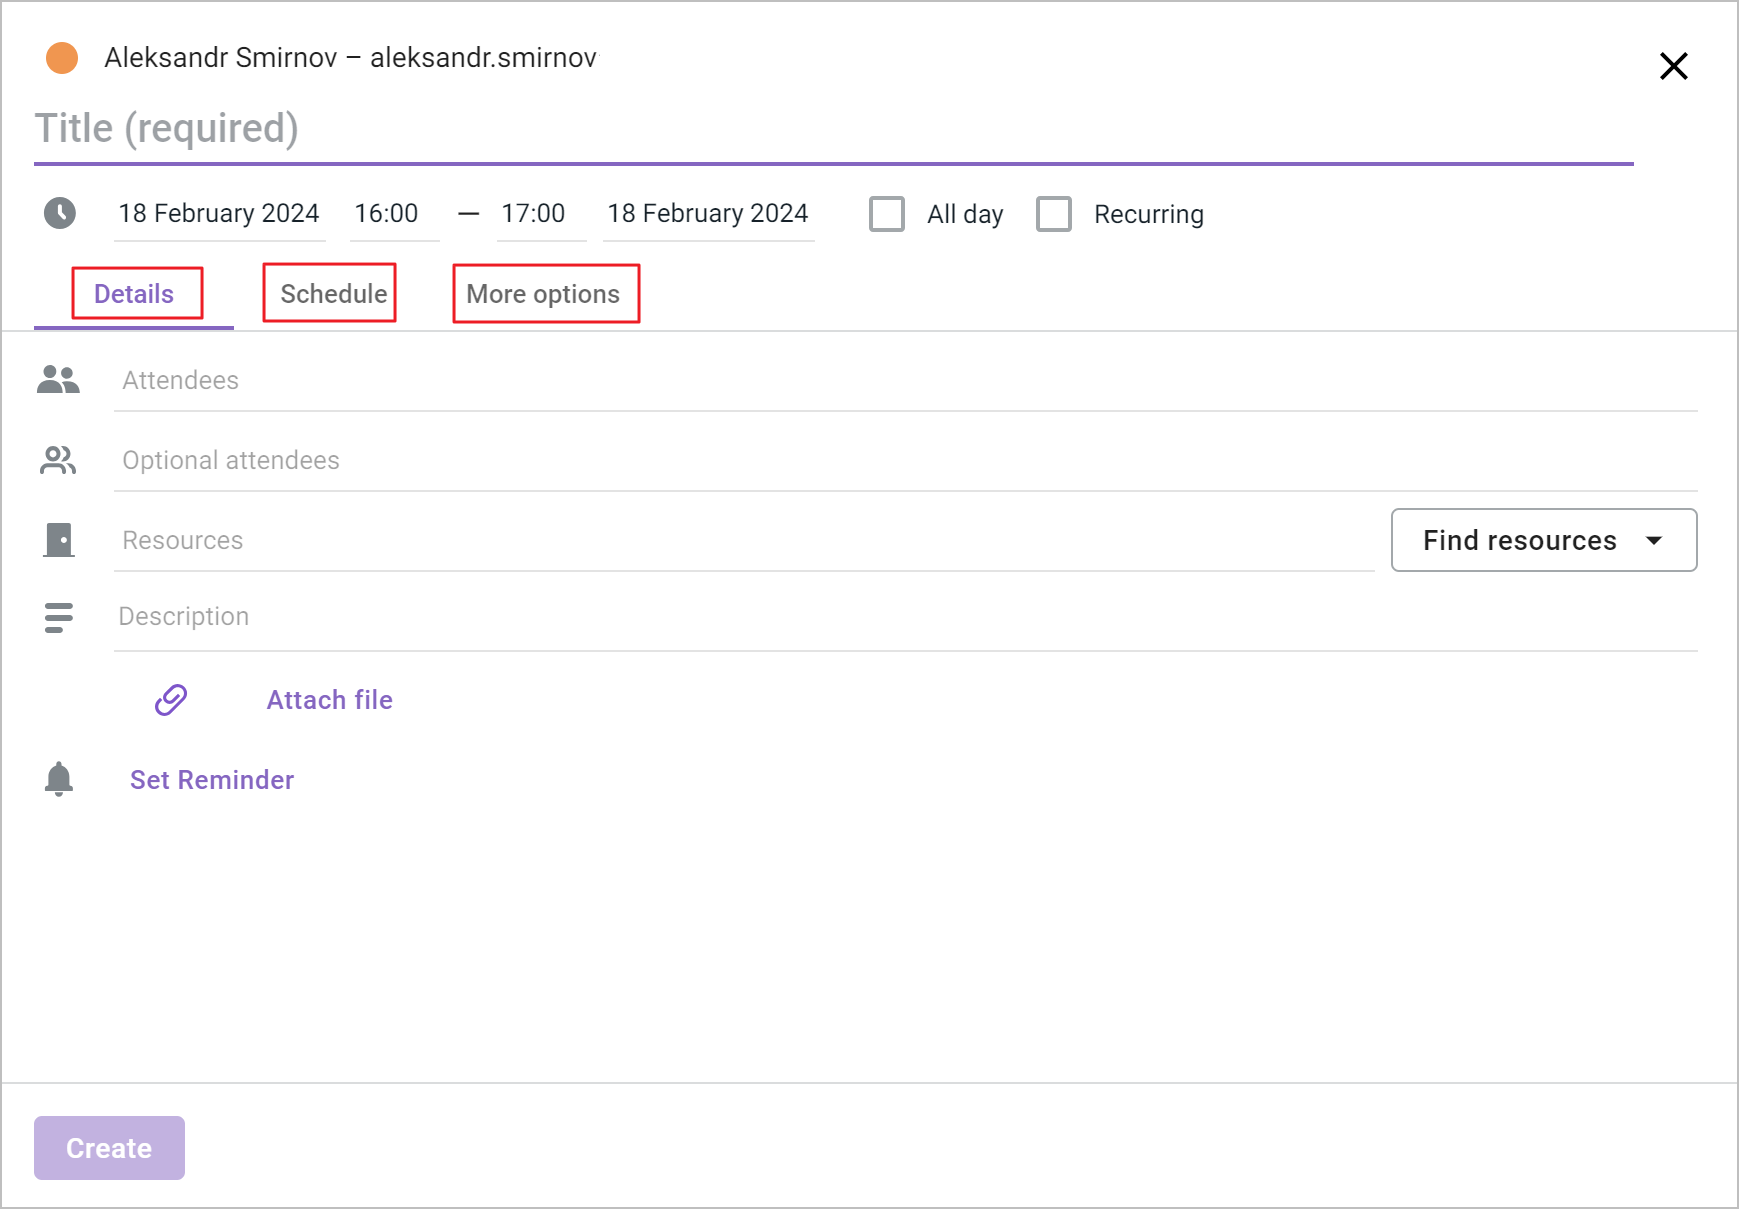
The name of the currently open tab is highlighted in purple and underlined.
Select a calendar
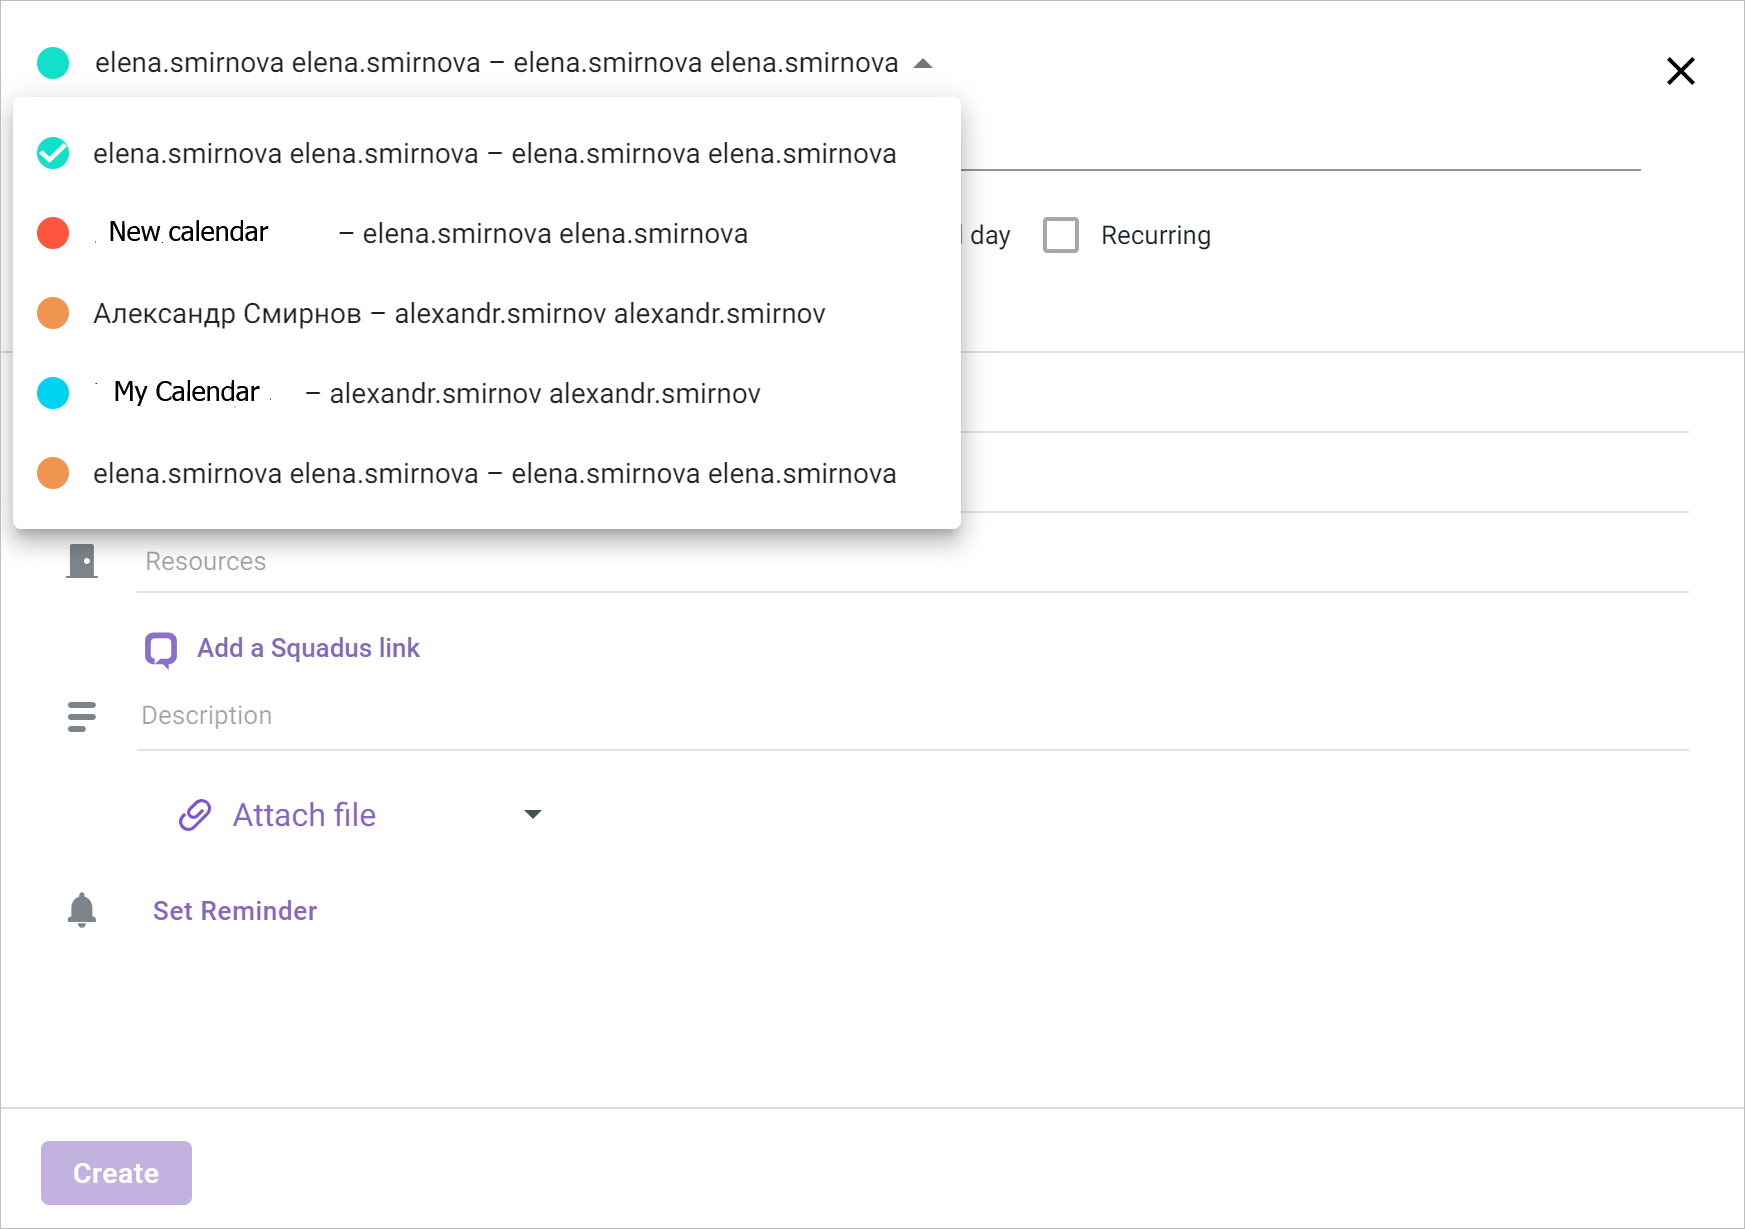
When multiple calendars are available, follow these steps: 1.Click the 2.In the list that opens, select the calendar in which you want to create a new event:
Creating an event on behalf of another person If you have access to other users' calendars with calendar editing permissions, you can create an event on behalf of another person. To do this, proceed as follows: 1.Click the 2.From the drop-down list, select the user's calendar in which the event will be created. Notifications to email addresses of attendees will be sent on behalf of the event organizer. The user who created the event on behalf of the calendar owner will be given the option to confirm or decline their participation. |
Title
Enter the name of the event in the appropriate field, briefly describe the event and specify the location where the event will take place. |
Date and time
When you open the event creation window, it displays the automatically assigned start and end date and time of the event (in the line below the title). If necessary, you can modify this data. To edit the date or time, left-click the value and select a different value in the drop-down window. If the event will take up the entire workday, you can check the All Day box. The following points should be kept in mind when you are working with the dates of an event: 1.When you create an event, the default start date is the same as the end date of the event. 2.If the event is created for one day (the start date is the same as the event end date), the All day box is checked and the end date has not been changed, then when you change the event start date, the end date will automatically change and become the same is the start date. For example, an event was created with a start date and an end date of July 24, the All day box was checked. The start date is changed to July 25: the end date will automatically change to July 25. The start date is changed to July 23: the end date automatically changes to July 23. 3.If an event is will last for several days, that is, the end date of the event was changed at least once, the All day box is unchecked, then when you change the start date of the event, the set duration of the event will remain, the end date will automatically change. Changing the end date of the event will not affect the start date, but will change the duration of the event. For example, an event was created with a start date and an end date of July 24 from 2:00 pm to 3:00 pm. The end date is changed to July 26 (the duration of the event is now 2 days and 1 hour). The start date is changed to July 27. Then the end date will automatically change to July 29, the duration of the event will remain the same. The end date is changed to July 28. Then the start date has not changed (July 27), the duration of the event has decreased. 4.If an event is created for several days, that is, the end date of the event is changed at least once, and the All Day box is checked, then when the end date of the event is changed, the set duration of the event is saved and if the start date is changed, the end date of the event is automatically changed. Changing the end date of an event will not affect the start date, but the duration of the event will change. For example, an event was created with a start date and an end date of July 24, the All day box was checked. The end date has been changed to July 26 (the event duration is now 3 days). The start date changed to July 26: the end date will automatically change to July 28, duration of the event will remain the same. The end date has been changed to July 27, the start date has not changed (July 26), the duration of the event has decreased. Recurring event To create a recurring event, do the following: 1.When editing the date and time of an event, check the Recurring box. A line with the event recurrence settings will open. 2.Specify the desired values of the event recurrence parameters. 3.If the repetition rate field is set to Other, a window for selecting additional parameters will open. It is necessary to specify the required parameter values and click the OK button. The window will close. The event recurrence parameters will be set.
|
Information on attendees
You can specify event attendees on the Details and Schedule tabs. There are two types of event attendees: •Attendee: An attendee whose presence at the event is required. •Optional attendee: An attendee whose presence at the event is optional. To specify required/optional attendees of the event, on the Details tab in the Attendees/Optional attendees fields, enter the email addresses of the attendees (either manually or by selecting from the drop-down list that appears when you enter the first characters in the field). You can also paste a list of addresses that you copied to the clipboard when viewing an email, another event, or a group of contacts. If a group (mailing groups) is/are selected as an attendee/optional attendee, there is a button
When you click this button, the list of members of this group is displayed. If necessary, you can delete some of the addresses from the event attendees. To collapse a group, click To view the availability of invited attendees click the Schedule tab. This tab displays information about the attendees availability by hours for the selected date and provides an opportunity to change the event time taking into account the attendees availability. To change the attendee type (required/optional), drag the attendee with the mouse from one line to another. You can also change the attendee type on the Schedule tab. Attendees with external mailbox email addresses may be invited to the event. After entering the external email address, press Enter or Space on the keyboard. To remove an attendee from the list of the invited, click the |


Information on resources
You can select event resources (meeting rooms, Zoom conferences) from the Details and Schedule tabs. You can use the following methods to select resources on the Details tab: 1.Selection of the Resources field from the drop-down list. 2.Automatic search for resources available at the designated time of the event (Find resources button).
To select resources from the Resources field list, proceed as follows: 1.Left-click the Resources field, a drop-down list of resources will open. Resources available at the scheduled time of the event are marked in the list with a green dot, those not available are marked with a red dot. If the availability of a resource could not be determined for any reason, it is marked with a gray dot. 2.Select the desired resource in the list by left-clicking. To simplify the selection, you can enter several consecutive characters from the name or address of the resource into the field. The list will change to include only those resources whose name or address contains the character sequence entered in the field. Once selected, the list will close and the selected resource will be added to the field. 3.If you need to add more than one resource, repeat the selection procedure.
To use the automatic search for resources available at the designated event time, do the following: 1.Click the Find Resources button:
2.In the form that opens, select a resource type from the drop-down list. 3.Click the Find button. A list of resources of the selected resource type available during the event will be displayed. If no available resources can be found at the scheduled time, a message informing you of this will be displayed, asking you to change your search criteria. 4.Select (check the boxes) one or more resources needed for the event. 5.Click the Add button. The selected resources will be added to the Resources field.
To delete the selected resource, click the It is convenient to view the availability of selected resources at other times on the Schedule tab. |

Select attendees and resources in the Schedule
The Schedule tab displays attendees and resources in a single list, in the following order (with attendees with the same status displayed in alphabetical order): •Event organizer •Resources (meeting rooms) •Required attendees •Optional attendees •Required attendees with external mailbox email addresses •Optional attendees with external mailbox email addresses
Attendees tab The sorting of the list of attendees with internal email addresses can be changed. To select the sorting criterion, click the The maximum number of attendees in the list that can be sorted is 50.
Avatars of the event organizer and optional attendees are marked with icons. Time intervals during which an attendee may be busy are highlighted in the Schedule according to the attendee's responses to invitations to other events: •There is no attendee response to the event invitation: The event time is framed and not highlighted. •Participation is tentatively accepted: The time of the event is indicated by the shaded area. •Participation is confirmed: The event time is evenly filled with color. •Participation was declined or no events were scheduled: Time is not highlighted. When you hover the cursor over the selected time intervals, a pop-up tooltip appears with information about the user's availability, including the break (buffer time), if it was set in the settings: Accepted/Tentative/Not yet responded, event time, for optional attendees, the Optional Attendee status is specified. The time of attendees with external mailbox email addresses is evenly filled in color. When you hover the cursor, a pop‑up window appears with a warning that there is no availability information for this attendee. To add an event attendee, enter their email address in the To change the type of an attendee (required/optional), left-click their avatar and select the required value in the list that opens. Change the time of the event The column of the created event (filled with the color of the calendar) can be moved by left-clicking the timeline to the right and left to choose the most convenient time and optimally plan the occupancy of the attendees. You can also change the duration of the event by left-clicking the right border of the column and pulling left or right. The created event column does not cover lines of attendees with external mailbox email addresses and is limited to internal attendees. Resources Resource occupancy is displayed in the Schedule grid. Time intervals during which the resource is busy are highlighted, and a tooltip appears when you hover over them. To add a resource to the list, do the following: 1.Click the Find Resources button. 2.In the form that opens, select a resource type from the drop-down list. 3.Click the Find button. A list of resources of the selected resource type available during the event will be displayed. If no resources are available at the designated time, a message will be displayed informing you of this and asking you to change your search criteria. 4.Select (check the boxes) for one or more of the resources required for the event. 5.Click the Add button. The selected resources will be added to the list and their occupancy will be displayed in the Schedule grid. You can also enter the email address of the resource in the |

 field. Attendees added in this manner are considered required by default.
Description
Enter data in the Description field on the Details tab, summarizing the details of the event. If necessary, you can add a link to a web page, invitees will see a hyperlink to the specified URL in the description. If a Zoom conference is selected as the resource for the event, when you save the event, a link to connect to that conference will automatically be added to the description. |
Attach a file
To attach a file, click Attach file. Select the location from which you want to upload the file (From computer, From cloud, Upload to cloud and attach) in the drop-down menu. To upload files from the cloud, it is necessary for the administrator to set up the integration of MyOffice Mail with MyOffice Private Cloud.
All further actions are described in detail in the section describing how to add an attachment to an email. The total size of attachments should not exceed 10 MB. A file attached to the event or a link to a file in the cloud will be displayed as rectangles:
If the attachment was added as a link, event attendees who use the email client's desktop application will receive a link to the file's cloud storage as an attachment in the email. The attachment can be deleted by clicking the |

 button.
Reminders
For all created events, an event reminder is automatically set 5 minutes before the start of the event. To change the reminder time, left-click the field with the reminder time and select another time from the list that opens. To set additional notifications, do the following: 1.In the window of event creation, on the Details tab, click Set Reminder. The reminder settings bar will appear. 2.Left-click the field with the reminder type and select the required value from the drop-down list. 3.Left-click the field with the reminder time and select the required time from the drop-down list. To delete a reminder, click the |
Receiving notifications from attendees
The event organizer automatically receives meeting confirmation/rejection notifications from event attendees. To disable notifications, go to the More options tab and check the Turn off the email response notifications box. |
Availability
If necessary, you can specify the parameters of your availability (busy or free) on the More options tab. |
Close the event creation window
Use one of the options to close the window (at any stage of event creation): 1.In the event creation form, click •Cancel: Return to the event creation or editing window. •Do not save: The event creation window will be closed automatically, the changes will not be saved. •Save: The event will be displayed on the coordinate grid in the cell with the corresponding date. To further work with the event, click it in the workspace. 2.Click anywhere in the calendar that is outside of the new event creation form. A warning message about unsaved changes will be displayed, requiring you to select an action. Select the necessary command: •Cancel: Return to the event creation or editing window. •Do not save: The event creation window will be closed automatically, the changes will not be saved. •Save: The event will be displayed on the coordinate grid in the cell with the corresponding date. To further work with the event, click it in the workspace.
|

Complete the event creation. Send invitation emails to attendees
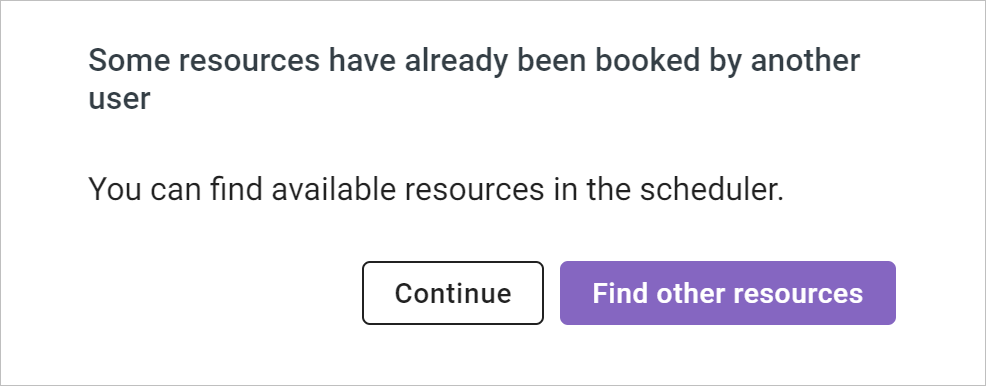
When you finish entering the data, click Create and select the necessary variant of notification of invited attendees: •Send: Event attendees are automatically notified when a new event is created. •Do not send: Disable sending notifications about the event to attendees email addresses. •Cancel: Return to the event creation form. The event time and language in the invitation email to participants from the Colleagues address book (users with internal email addresses) are specified according to the recipients settings. The created event will be displayed in the calendar, in the cell with the corresponding date, with the organizer's sign Sometimes after clicking Create, the following message may appear:
This means that by the time you click Create, some of the resources selected for the event have been booked for other events. Click one of the following buttons: •Find other resources: Return to the event creation window and select other resources. •Continue: Finish creating the event despite the resource being busy. The event will be created and the organizer will receive a resource occupancy notification in an automatically generated booking results email. |