View a calendar
To go to the Calendar section, use any of the following methods:
•In the section switching menu, click the Calendar button.
•In the Application menu, click Calendar.
The Navigation bar lists all calendars available to the user in the calendar list. Each calendar contains its own set of events. The events of all calendars from the calendar list are displayed in the calendar grid in the workspace.
When you hover over an event, a tooltip appears with information about the event. Clicking on the event with the left mouse button opens a window with more detailed information.
Navigating the calendar workspace
You can select the desired month, week, or day to display in the workspace using the To quickly return to the current day/week/month, click Today. To view the events of a particular day with the selected time unit Month, click on the date in the day cell. You can return to the calendar grid for the month in one of the following ways: •Click the time unit selection button and select the Month value. •Click the |


Highlight events in the workspace
The event entries in the workspace have different colors. The color of the entry corresponds to the color of the calendar in which the event is located and the color of the check box to the left of the calendar name. Scheduled events are marked in the calendar according to the user response to the invitation: •The accepted event is a uniform color fill. •Tentatively accepted: hatched. •Not seen or answered: outlined. Events for which the user is the organizer are marked in the calendar with Recurring events are marked with The user can view information about the event, as well as suggest or make changes to the event parameters. |


Change the scale of the workspace time grid
The scale of the time grid in the workspace can be changed. To do this, do the following: 1.Click the time unit selection button on the Toolbar. 2.Select the scale of the time grid from the drop-down list: Week, Month, or Day. When viewing events for a day or a week, events with the duration of the All day are additionally displayed above the time grid. If a user has more than three events assigned to one date while viewing events for a month, the information about a list of events will appear in the corresponding cell. |
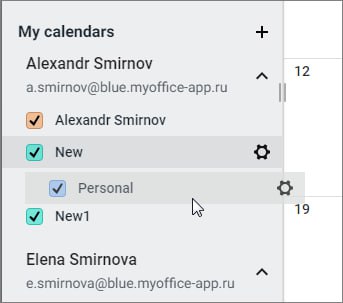
List of calendars
The calendar list has two sections: •There is always a calendar for the user's account in the My Calendars section, which is created automatically. By default, it is named by the account name and is the default calendar If a user has multiple accounts, the My calendars section must have one automatically created calendar for each connected account. •The calendars of colleagues that the user has been granted access to are listed in the Shared section.
The user can create new calendars for their accounts. The calendars created by the user are displayed in the My calendars section, under the default calendar calendar of the account that was selected for the calendar when it was created. |
Enable and disable calendars
In order for calendar events to be displayed in the workspace, the calendar must be connected. To connect a calendar, select the check box To disable the calendar, uncheck the check box Disabled calendar events are not displayed in the workspace. |


Change the order of calendars in the Navigation bar
By default, the calendars created by the user are placed in the account's calendar list in the order they were created: the one created later is lower than the ones created earlier. The order of the calendars in the list can be changed (except the default account calendar). To do this, proceed as follows: 1.Hover the cursor over the name of the calendar. The calendar row will be highlighted in color, and the cursor will look like 2.Press the left mouse button and, without releasing it, move the calendar to the desired location in the account calendar list:
3.Release the left mouse button. Attention!
The calendar assigned as the default calendar is always displayed first in the account's calendar list. You cannot change its place in the list.
|

Information in the pop-up event notification
When you hover over an event, a pop-up notification appears with information about the event: •The organizer or participant's personal calendar displays: the name of the meeting, the time, the organizer, the names/email addresses of two participants and the number of participants not displayed on the notification (for example, in a meeting with five participants, two names/email addresses + 3 participants will be indicated). •In the calendar to which access has been granted: •The following information is displayed for the organizer: the name of the meeting, the time, the organizer, the names/email addresses of two participants and the number of participants not displayed on the notification (for example, in a meeting with five participants, two names/email addresses + 3 participants will be indicated). •The following information is displayed for the participant (not for the organizer): the name of the meeting, the time, the organizer, you (as a participant), the name/email address of another participant and the number of participants not displayed on the notification (for example, in a meeting with five participants it will be indicated: "You", <name/email address of another participant> + 3 participants). •For a user who is neither an organizer nor a participant, the following information is displayed: the name of the meeting, the time, the organizer, the names/email addresses of two participants and the number of participants that are not displayed on the notification (for example, in a meeting with five participants, two names/email addresses + 3 participants will be indicated). |